


Uniting Complexity: A Comprehensive Guide to Creating Master Documents in Microsoft Word
In the realm of document management and collaboration, master documents serve as powerful tools for organizing, managing, and integrating multiple...
 Instructions on How to Take Screenshots While Scrolling on Windows and macOS
  How to Speed Up Your Windows PC Without Installing Extra Software
  A Guide to Working Remotely Like a Pro: Configuration, Tools, and the Most Effective Methods
  How to Make Images Generated by Artificial Intelligence Look Realistic
  (A Step-by-Step Guide) How to Improve the Speed of Your Internet Connection at Home
 In the realm of document management and collaboration, master documents serve as powerful tools for organizing, managing, and integrating multiple...

In the realm of document formatting and organization, section breaks serve as essential tools for dividing content, controlling page layout,...
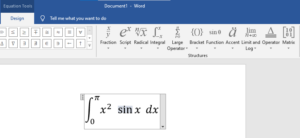
In the realm of academic and technical writing, equations serve as powerful tools for expressing mathematical relationships, scientific concepts, and...
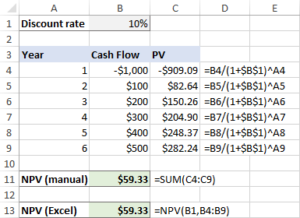
The NPV (Net Present Value) function in Excel is a powerful tool for evaluating the profitability of an investment by...
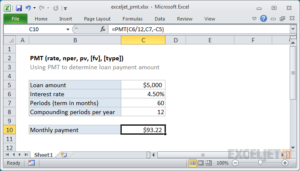
The PMT function in Excel is a powerful tool for calculating loan payments, helping users determine the periodic payments required...
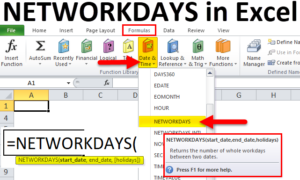
The NETWORKDAYS function in Excel is a powerful tool for calculating the number of working days between two dates, excluding...
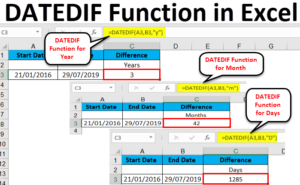
The DATEDIF function in Excel is a powerful yet often overlooked tool for calculating the difference between two dates in...