
How to Turn on or Off the Background Image for the Sign-in Screen in Windows 10
How to Turn on or Off the Background Image for the Sign-in Screen in Windows 10 Windows 10 lets users...
How to Turn on or Off the Background Image for the Sign-in Screen in Windows 10 Windows 10 lets users...
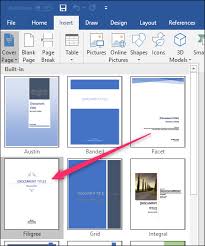
In the world of document design and presentation, a well-crafted cover page sets the tone for what lies within, capturing...
In academic and professional writing, citing sources and providing references are essential practices for acknowledging the work of others and...
In the realm of document management and collaboration, master documents serve as powerful tools for organizing, managing, and integrating multiple...
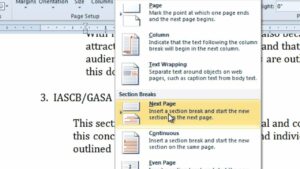
In the realm of document formatting and organization, section breaks serve as essential tools for dividing content, controlling page layout,...
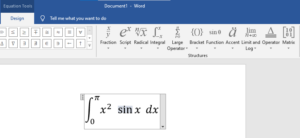
In the realm of academic and technical writing, equations serve as powerful tools for expressing mathematical relationships, scientific concepts, and...
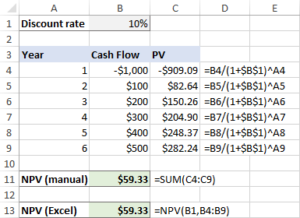
The NPV (Net Present Value) function in Excel is a powerful tool for evaluating the profitability of an investment by...