Transforming Realism into Artistry: A Comprehensive Guide to Using the Oil Paint Filter in Photoshop for Painting-Like Effects
Introduction:
Adobe Photoshop stands as a powerhouse for digital creativity, offering a multitude of tools and filters to transform ordinary images into extraordinary works of art. Among these, the Oil Paint filter serves as a particularly enchanting feature, allowing photographers and artists to convert photographs into paintings with remarkable realism. In this in-depth guide, we will explore the step-by-step process of using the Oil Paint filter in Photoshop, unlocking the ability to turn photos into captivating, painterly masterpieces.
I. Understanding the Oil Paint Filter:
A. Definition and Purpose:
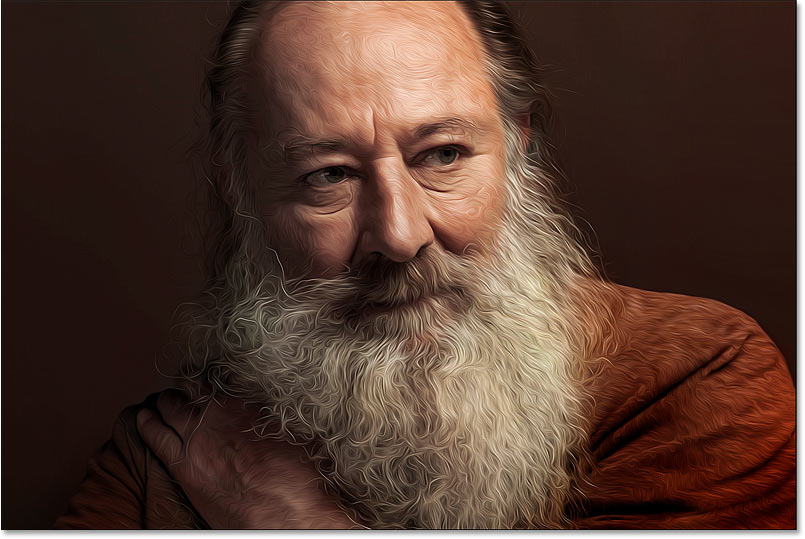
- The Oil Paint filter in Photoshop replicates the appearance of a traditional oil painting.
- Its purpose is to add a painterly texture, brushstroke details, and a harmonious blend of colors to photographs.
B. Key Features of the Oil Paint Filter:
- Brush Strokes: Emulates the distinct brushwork found in oil paintings.
- Surface Texture: Adds a tactile quality, resembling the canvas texture of traditional paintings.
- Blending of Colors: Creates a smooth and blended transition between different hues.
- Realistic Lighting: Mimics the play of light and shadow, enhancing the overall three-dimensional feel.
II. Preparing Your Image for the Oil Paint Filter:
A. Selecting an Appropriate Image:
- Choose an image with clear subject focus and distinct details.
- Images with well-defined elements yield more captivating oil paint effects.
B. High-Resolution Images:
- Begin with a high-resolution image to ensure clarity and detail in the final result.
- Higher resolution allows for more intricate brushstroke details and a nuanced painterly appearance.
C. Duplicate Your Background Layer:
- Create a duplicate layer of your image to work non-destructively.
- This allows you to compare the original and edited versions, making adjustments as needed.
III. Accessing the Oil Paint Filter in Photoshop:
A. Opening the Filter Gallery:
- Navigate to the Filter menu in Photoshop.
- Choose the Filter Gallery option to access a variety of filters, including the Oil Paint filter.
B. Applying the Oil Paint Filter:
- In the Filter Gallery, locate the Oil Paint filter under the Stylize category.
- Adjust the sliders for Stylization, Cleanliness, Scale, Bristle Detail, Angular Direction, and Shine to customize the oil paint effect.
- Preview the changes in real-time and fine-tune the settings to achieve the desired painterly look.
C. Preview and Adjustments:
- Use the preview checkbox to toggle between the original and filtered versions.
- Experiment with different settings until you achieve a balance between painterly effects and maintaining the essence of the original image.
IV. Refining the Oil Paint Effect:
A. Masking for Selective Application:
- Apply the Oil Paint filter to specific areas by using layer masks.
- Create a mask and paint with black to reveal the original image selectively.
B. Adjusting Opacity and Blending Modes:
- Fine-tune the overall intensity of the oil paint effect by adjusting the layer opacity.
- Experiment with blending modes to enhance the integration of the oil paint filter with the original image.
C. Smart Filters for Non-Destructive Editing:
- Convert your image layer into a Smart Object before applying the Oil Paint filter.
- This allows for non-destructive editing, enabling adjustments to the filter settings even after initial application.
V. Enhancing Color Vibrancy and Saturation:
A. Color Adjustments:
- Use adjustment layers like Vibrance and Saturation to enhance the overall color intensity.
- Adjust these layers selectively to prevent oversaturation in specific areas.
B. Curves for Contrast and Depth:
- Utilize Curves adjustment layers to enhance contrast and add depth to the oil paint effect.
- Fine-tune the curve for both highlights and shadows.
VI. Adding Texture for Realism:
A. Texture Overlay:
- Experiment with texture overlays to simulate the tactile quality of canvas.
- Apply a texture layer in Overlay or Soft Light blending mode.
B. Custom Brushes for Detail:
- Use custom brushes to add finer details and enhance the brushstroke realism.
- Adjust the brush opacity and size for controlled detailing.
VII. Saving Your Artistic Masterpiece:
A. Save Your Photoshop Document:
- Save your work in the native Photoshop (.PSD) format to retain layers and editable elements.
- This allows for future adjustments and refinements.
B. Exporting for Different Mediums:
- When preparing for print, export your final image in a high-resolution format such as TIFF or PDF.
- For web use, export in web-friendly formats like JPEG or PNG, balancing quality and file size.
VIII. Tips for Optimal Oil Paint Results:
A. Experiment with Different Settings:
- The beauty of the Oil Paint filter lies in experimentation. Try various combinations of settings to discover unique and appealing effects.
- Adjust the sliders in real-time, observing their impact on the image.
B. Embrace Varied Styles:
- The Oil Paint filter is versatile and can emulate various painting styles. Experiment with settings to achieve a classic oil painting, impressionistic, or contemporary look.
- Adapt the filter to suit the mood and style you wish to convey.
C. Combine Filters for Artistic Fusion:
- Combine the Oil Paint filter with other Photoshop filters to create a fusion of artistic effects.
- Experiment with combinations to achieve a unique and personalized result.
IX. Conclusion:
Mastering the art of using the Oil Paint filter in Photoshop to turn photos into paintings adds a dimension of artistic expression to your digital repertoire. This comprehensive guide has equipped you with the knowledge and techniques to confidently apply the Oil Paint filter, transforming ordinary images into captivating, painterly masterpieces. As you explore the nuances of painterly effects and refine your skills, the ability to infuse your digital creations with the timeless allure of oil paintings becomes a valuable asset in your artistic toolkit. Embrace experimentation, celebrate the fusion of realism and artistry, and let the Oil Paint filter elevate your digital imagery to new heights of creative expression.


