Mastering Exploded Renderings in SolidWorks: A Comprehensive Guide
Introduction: Exploded renderings in SolidWorks offer a powerful way to visually communicate the assembly process and highlight the individual components of a design. By strategically disassembling and arranging components in 3D space, engineers, designers, and visualizers can convey the assembly sequence, part relationships, and design features effectively. In this comprehensive guide, we’ll explore the intricacies of creating exploded renderings in SolidWorks, covering fundamental concepts, essential techniques, and advanced strategies to help you master this crucial aspect of design visualization.
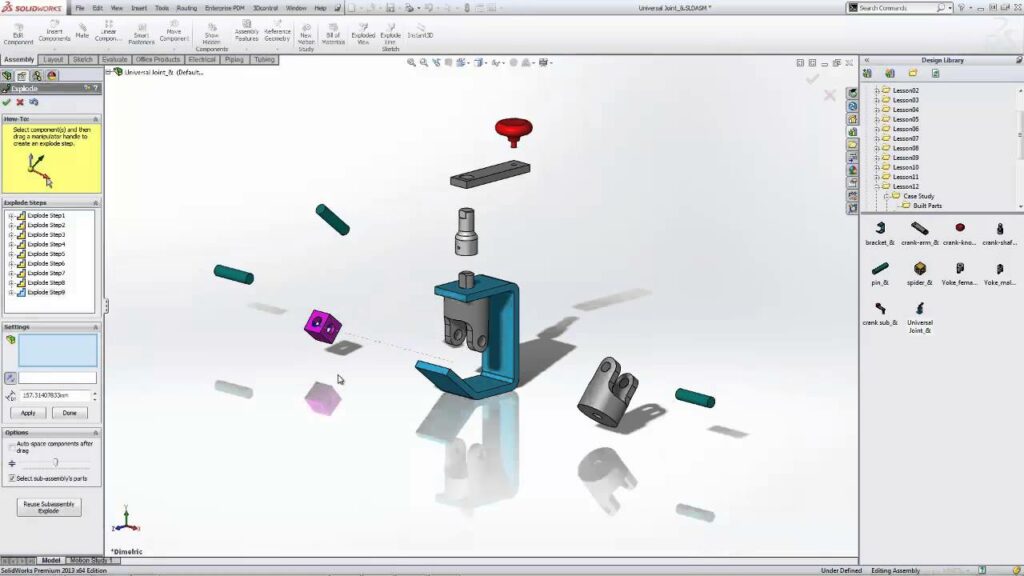
Understanding Exploded Renderings in SolidWorks: Exploded renderings in SolidWorks involve breaking down the assembly into its individual components and arranging them spatially to illustrate their relative positions and interactions. By separating, translating, and rotating components along their assembly axes, users can create dynamic visualizations that provide insights into the assembly process, part relationships, and functionality. Before delving into the specifics of creating exploded renderings, it’s essential to grasp some foundational concepts:
- Assembly Structure:
- Exploded renderings are based on the hierarchical structure of assemblies in SolidWorks, where components are organized into subassemblies and parts. Understanding the assembly structure allows users to identify and manipulate components effectively during the explosion process.
- Explode Steps:
- Explode steps define the sequence and magnitude of component movements in the exploded view. SolidWorks provides tools for creating and editing explode steps, specifying translation distances, rotation angles, and component relationships to achieve desired explosion effects.
- Assembly Relationships:
- Assembly relationships such as mates, constraints, and connections govern the spatial relationships between components within the assembly. Exploding an assembly involves temporarily breaking these relationships to separate and reposition components for visualization purposes.
Creating Exploded Renderings in SolidWorks: Let’s explore the essential steps for creating exploded renderings in SolidWorks:
- Prepare the Assembly:
- Begin by preparing the assembly for explosion by ensuring that it is fully defined, constrained, and organized. Review the assembly structure, component relationships, and assembly constraints to identify potential issues or constraints that may impede the explosion process.
- Define Explode Steps:
- Define explode steps to specify the sequence and magnitude of component movements in the exploded view. Use the “Explode” tool in SolidWorks to create new explode steps or edit existing ones, specifying translation distances, rotation angles, and component relationships as needed.
- Manipulate Components:
- Manipulate components within each explode step to separate, translate, and rotate them along their assembly axes. Use the drag handles, triad manipulator, or numeric inputs to adjust component positions and orientations precisely, ensuring alignment with the explosion sequence.
- Fine-Tune Explode Sequence:
- Fine-tune the explode sequence by adjusting component positions and relationships to achieve desired visual effects and clarity. Experiment with different explode step configurations, component orientations, and viewing angles to optimize the explosion sequence and presentation.
- Add Annotations:
- Add annotations, callouts, and labels to identify components, features, and assembly steps within the exploded view. Use SolidWorks annotation tools to create leader lines, text notes, balloons, and symbols that provide context and guidance for viewers.
- Preview and Evaluate:
- Preview the exploded view in SolidWorks graphics area or using real-time rendering tools to evaluate the explosion sequence and visual clarity. Assess component positions, relationships, and annotations to ensure alignment with design intent and communication objectives.
- Save and Export:
- Save the exploded view configuration as part of the assembly file or as a separate exploded view file for future use. Export the exploded view as images, animations, or interactive presentations to share with stakeholders, clients, or manufacturing teams.
Advanced Exploded Rendering Techniques: In addition to basic explosion tools, SolidWorks offers advanced techniques to enhance exploded renderings:
- Motion Studies:
- Use motion studies in SolidWorks to create dynamic exploded animations that illustrate the assembly process in motion. Animate explode steps, component movements, and assembly transformations to simulate the assembly sequence and operation visually.
- Exploded Lines:
- Add exploded lines or trajectories to highlight the paths of component movements within the exploded view. SolidWorks provides tools for creating exploded lines, connectors, and trails that visually convey the explosion sequence and component relationships.
- Exploded Configurations:
- Create multiple exploded configurations to showcase different assembly views, orientations, or explosion sequences. Use configuration manager in SolidWorks to manage and switch between exploded configurations, allowing for flexible presentation options.
Best Practices for Exploded Renderings: To maximize the effectiveness and visual impact of exploded renderings in SolidWorks, consider the following best practices:
- Plan and Sequence:
- Plan the explosion sequence and sequence of movements to convey the assembly process logically and intuitively. Consider the order of component disassembly, part relationships, and viewing angles to guide the explosion sequence effectively.
- Maintain Clarity:
- Maintain visual clarity and comprehension by avoiding clutter, overlapping components, or excessive movement in the exploded view. Use grouping, spacing, and alignment techniques to organize components and streamline the explosion sequence.
- Use Consistent Annotations:
- Use consistent annotations, callouts, and labels to provide context and guidance within the exploded view. Ensure that annotations are clear, legible, and aligned with component positions to facilitate understanding and interpretation.
- Test and Iterate:
- Test the exploded view with different viewing angles, perspectives, and presentation formats to evaluate its effectiveness and visual impact. Solicit feedback from stakeholders, colleagues, or end-users and iterate on the explosion sequence based on their input and suggestions.
Conclusion: Exploded renderings in SolidWorks are invaluable tools for visualizing assembly processes, highlighting design features, and communicating part relationships effectively. By mastering the techniques and principles of creating exploded renderings, you can enhance your design presentations, facilitate collaboration, and streamline manufacturing processes efficiently. Whether you’re a novice or an experienced SolidWorks user, understanding the fundamentals of exploded rendering and adhering to best practices will elevate your design visualization skills and enable you to create compelling and informative exploded renderings with confidence.


