Mastering Efficiency: A Comprehensive Guide to Customizing Workspace Layout in Adobe Dreamweaver

Introduction: Adobe Dreamweaver is a versatile and powerful tool for web design and development, offering a wide range of features and customization options to suit the needs of every user. One of the key aspects of optimizing your workflow in Dreamweaver is customizing the workspace layout to best accommodate your preferences and work style. In this extensive guide, we’ll explore the ins and outs of customizing the workspace layout in Adobe Dreamweaver, from rearranging panels and toolbars to creating custom workspaces and keyboard shortcuts, empowering you to create a workspace that maximizes efficiency and productivity.
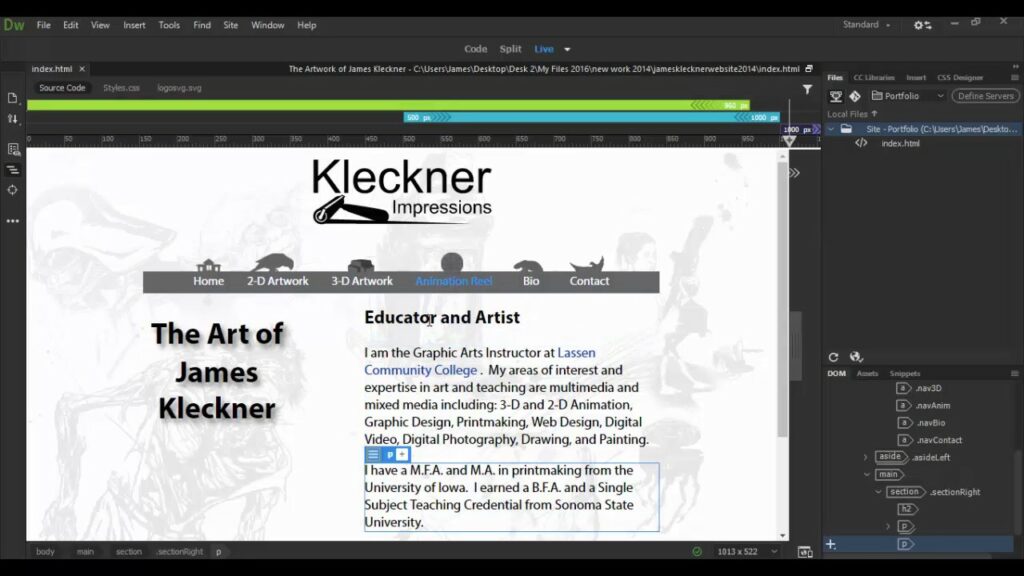
Understanding Workspace Layout: The workspace layout in Adobe Dreamweaver refers to the arrangement and organization of various panels, toolbars, and windows within the application interface. Dreamweaver provides a flexible and customizable workspace that allows users to tailor the layout to their specific needs and preferences. Whether you’re a designer, developer, or both, customizing the workspace layout can help streamline your workflow, improve productivity, and enhance overall user experience.
Customizing Panels and Toolbars: One of the first steps in customizing the workspace layout is rearranging panels and toolbars to optimize accessibility and visibility. Here’s how to customize panels and toolbars in Adobe Dreamweaver:
- Rearrange Panels: To rearrange panels, simply click and drag the title bar of the panel to the desired location within the workspace. You can dock panels to the left, right, top, or bottom of the application window, or float them as standalone windows.
- Resize Panels: Resize panels by clicking and dragging the edges or corners of the panel to adjust the width, height, or both.
- Collapse and Expand Panels: Minimize panel clutter by collapsing panels when not in use. Click on the double-arrow icon in the panel’s title bar to collapse or expand the panel.
- Customize Toolbars: Customize toolbars by right-clicking on any toolbar and selecting “Customize” from the context menu. Here, you can add, remove, or rearrange toolbar buttons to suit your workflow.
Creating Custom Workspaces: In Adobe Dreamweaver, you can create custom workspaces tailored to specific tasks or workflows. Custom workspaces allow you to save and recall different layouts, panel configurations, and toolbar settings with ease. Here’s how to create custom workspaces in Dreamweaver:
- Customize Workspace: Arrange panels, toolbars, and windows to create your desired workspace layout.
- Save Workspace: Go to the “Workspace” menu and select “Save Current Workspace.” Enter a name for your custom workspace and click “Save” to save the layout.
- Recall Workspace: To switch to a custom workspace, go to the “Workspace” menu, hover over “Switch Workspace,” and select the desired workspace from the list.
Creating Keyboard Shortcuts: Keyboard shortcuts are a powerful way to streamline your workflow and perform common tasks more efficiently in Adobe Dreamweaver. You can customize keyboard shortcuts to assign specific commands to key combinations of your choice. Here’s how to create keyboard shortcuts in Dreamweaver:
- Customize Keyboard Shortcuts: Go to the “Edit” menu, select “Keyboard Shortcuts,” and click on the “Shortcuts” tab.
- Choose Command: Select the desired command from the list of available commands.
- Assign Shortcut: Click on the “Add Shortcut” button, press the desired key combination, and click “OK” to assign the shortcut.
Optimizing Workspace for Specific Tasks: Depending on your role or the specific tasks you’re working on, you can optimize the workspace layout in Adobe Dreamweaver to maximize efficiency and productivity. Here are some tips for optimizing the workspace for common tasks:
- Design Projects: For design projects, focus on maximizing visual real estate by arranging panels and toolbars to prioritize the Document window and Properties panel.
- Coding Projects: For coding projects, emphasize code editing by enlarging the Code view, CSS Designer panel, and Files panel, and minimizing visual clutter.
- Responsive Design: For responsive design projects, utilize the Live view and responsive design tools to preview and test layouts across different devices and screen sizes.
- Collaboration: For collaborative projects, customize workspaces to facilitate communication and collaboration by incorporating chat or messaging panels and shared document views.
Best Practices for Workspace Customization: To make the most of workspace customization in Adobe Dreamweaver, consider the following best practices:
- Experiment and Iterate: Don’t be afraid to experiment with different layouts and configurations to find what works best for you. Iterate on your workspace design based on feedback and evolving needs.
- Maintain Consistency: Establish consistent naming conventions, panel arrangements, and keyboard shortcuts to promote familiarity and efficiency across projects.
- Stay Organized: Keep your workspace organized and clutter-free by regularly decluttering panels, removing unused toolbars, and grouping related panels together.
- Backup Settings: Backup custom workspace settings and keyboard shortcuts regularly to avoid losing customization in case of software updates or system changes.
Conclusion: Customizing the workspace layout in Adobe Dreamweaver is essential for optimizing efficiency, productivity, and user experience. By rearranging panels, creating custom workspaces, and assigning keyboard shortcuts, you can tailor the Dreamweaver interface to suit your specific needs and preferences, ultimately enhancing your ability to design, develop, and collaborate on web projects. Whether you’re a designer, developer, or both, mastering workspace customization empowers you to work smarter, faster, and more effectively in Adobe Dreamweaver, resulting in better-designed, more cohesive, and higher-quality web projects.


