Illuminating Perspectives: A Comprehensive Guide to Applying Brightness/Contrast Image Adjustment in Photoshop
Introduction:
Adobe Photoshop, a cornerstone in the world of digital imaging, provides an extensive toolkit for enhancing and transforming photographs. Among the essential image adjustment tools, the Brightness/Contrast adjustment stands out as a powerful tool to control the luminosity and contrast of an image. In this extensive guide, we will delve into the nuances of applying Brightness/Contrast adjustments in Photoshop, exploring its functionalities, creative applications, and best practices to elevate your image editing skills.
Understanding Brightness/Contrast Adjustment:
The Brightness/Contrast adjustment in Photoshop is a fundamental tool designed to modify the overall brightness and contrast of an image. This adjustment operates by altering the intensity of light and the difference between the darkest and lightest areas, providing a quick and straightforward way to enhance the visual impact of your photographs.
Key Components of Brightness/Contrast Adjustment:
- Brightness:
- Adjusting brightness alters the overall lightness or darkness of the entire image. Increasing brightness lightens the image, while decreasing brightness darkens it.
- Contrast:
- Contrast refers to the difference between the darkest and lightest parts of an image. Increasing contrast intensifies these differences, resulting in a more dynamic and visually striking image, while decreasing contrast produces a softer and more subdued appearance.
Step-by-Step Guide to Applying Brightness/Contrast Adjustment:
- Open Your Image:
- Launch Photoshop and open the image you want to enhance. Navigate to “File” > “Open” and select your image file.
- Access Brightness/Contrast Adjustment:
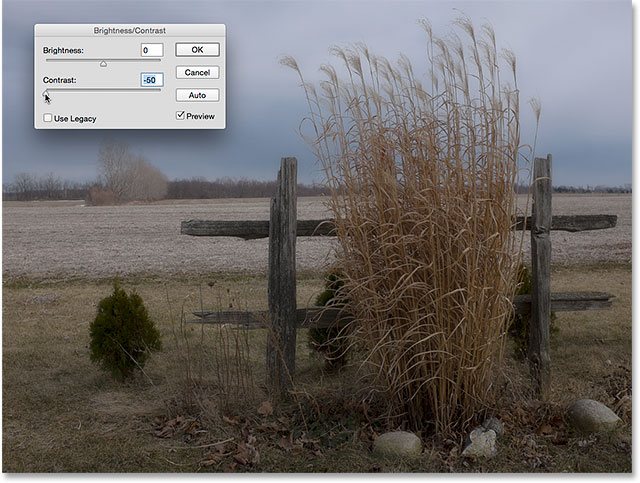
- Go to the “Image” menu and choose “Adjustments.” From the dropdown menu, select “Brightness/Contrast.”
- Adjust Brightness:
- In the Brightness/Contrast dialog box, locate the “Brightness” slider. Move the slider to the right to increase brightness or to the left to decrease it. Observe the real-time changes in your image.
- Modify Contrast:
- Next, adjust the “Contrast” slider. Move it to the right to increase contrast or to the left to decrease it. Preview the impact on your image and fine-tune until you achieve the desired result.
- Preview Changes:
- Toggle the “Preview” checkbox on and off to compare the adjusted image with the original. This allows you to assess the changes and make further refinements if necessary.
- Apply Adjustment:
- Once satisfied with the adjustments, click “OK” to apply the Brightness/Contrast changes to your image.
Tips and Techniques for Optimal Results:
- Use Adjustment Layers:
- For a non-destructive workflow, consider applying Brightness/Contrast adjustments as an adjustment layer. This allows you to revisit and modify the adjustments at any point in your editing process.
- Fine-Tune with Additional Tools:
- Combine Brightness/Contrast adjustments with other tools like Levels or Curves for more precise control over tonal ranges. This enhances your ability to fine-tune the image according to your artistic vision.
- Consider Masking:
- To selectively apply Brightness/Contrast adjustments to specific areas of an image, utilize layer masks. This enables targeted enhancements, ensuring that adjustments only affect desired regions.
- Avoid Overcorrection:
- Exercise restraint when adjusting brightness and contrast. Overcorrection can lead to loss of detail, clipping, or unnatural-looking results. Regularly zoom in and inspect your image to maintain optimal quality.
- Explore Legacy Options:
- In the Brightness/Contrast dialog box, consider checking the “Use Legacy” option. This activates a different algorithm for adjusting brightness and contrast, providing an alternative look that may better suit certain images.
Creative Applications:
- Enhancing Shadows and Highlights:
- Adjusting contrast allows you to enhance the distinction between shadows and highlights, bringing out details in both areas.
- Creating Moody Atmospheres:
- Decreasing brightness and contrast can lend a soft, moody atmosphere to images, ideal for certain genres like portrait photography or artistic compositions.
- Revitalizing Vintage Photos:
- Applying brightness and contrast adjustments can breathe new life into vintage or faded photographs, restoring vibrancy and clarity.
- Achieving High-Key or Low-Key Effects:
- Experimenting with extreme adjustments enables the creation of high-key or low-key effects, contributing to a distinctive visual style.
Common Pitfalls and Solutions:
- Loss of Detail:
- Excessive adjustments can result in the loss of detail, especially in highlights and shadows. Regularly check your image at 100% zoom to ensure critical details are preserved.
- Clipping:
- Be cautious about overadjusting, as it may lead to clipping – a situation where image data is lost in extreme highlights or shadows. Use histograms to monitor tonal distribution.
- Bandings in Gradients:
- Extreme adjustments can cause banding, visible as abrupt transitions in gradients. To minimize this, apply adjustments gradually and consider using higher bit-depth images.
Conclusion:
Mastering the application of Brightness/Contrast adjustments in Photoshop adds a powerful dimension to your image editing capabilities. Whether you’re aiming for subtle refinements or bold transformations, understanding the intricacies of brightness and contrast empowers you to control the visual narrative of your photographs. By following this comprehensive guide, you’re equipped with the knowledge and techniques needed to navigate the Brightness/Contrast adjustment tool with confidence. Remember to experiment, embrace creativity, and let your artistic intuition guide you as you illuminate your images with precision and impact.


