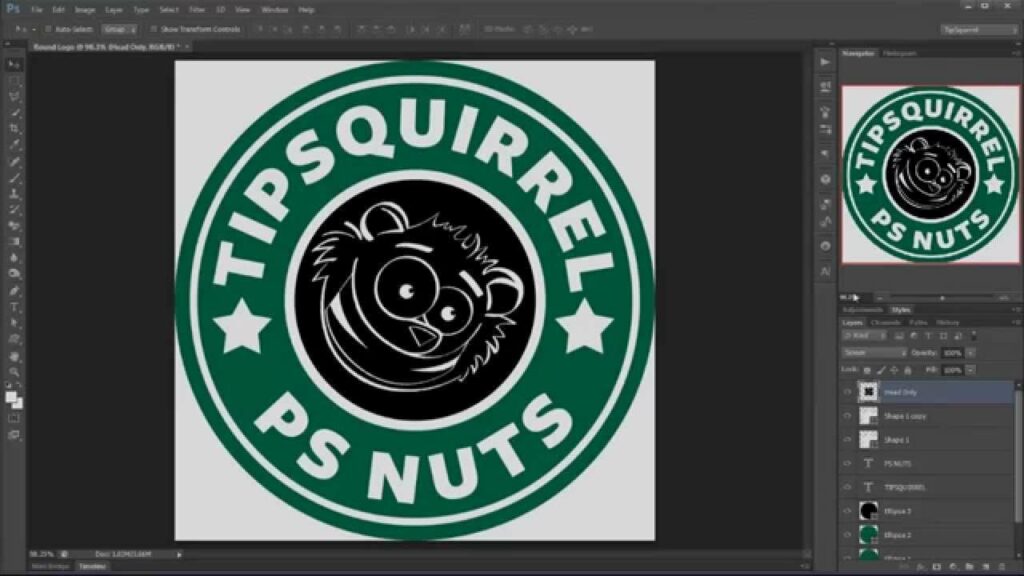
Circular Elegance: Mastering Text in a Circle with Photoshop

Adobe Photoshop, a powerhouse in graphic design, offers a myriad of tools and features that empower designers to bring their creative visions to life. Among these capabilities is the ability to type text in a circle, a technique that adds a touch of elegance and sophistication to various design projects. In this extensive tutorial, we will unravel the steps to seamlessly type text in a circle in Photoshop, exploring the tools, options, and nuances that ensure your circular text is not just aligned but visually captivating.
Section 1: Laying the Foundation
1.1 Creating a New Canvas
Begin by opening Adobe Photoshop and creating a new document. Set the canvas size and resolution based on your design requirements. A square canvas is often ideal for circular text to ensure a balanced composition.
1.2 Selecting the Ellipse Tool
Navigate to the Toolbar and select the Ellipse Tool. Hold down the Shift key while dragging to create a perfect circle. This circle will serve as the path along which your text will gracefully follow.
Section 2: Text on the Path
2.1 Activating the Type Tool
Once the circle is created, select the Type Tool (T) from the Toolbar. Hover over the path until the cursor changes to a slanted line with a dotted oval, indicating that you can now type along the path.
2.2 Clicking to Start Typing
Click on the path, and a blinking cursor will appear, ready for your text input. Type the desired text, be it a quote, a name, or any wording you wish to encircle.
Section 3: Customizing the Circular Text
3.1 Adjusting Text Settings
With the text still selected, explore the Character Panel to customize the font, size, and spacing of your circular text. Experiment with different fonts to find one that complements the circular arrangement.
3.2 Aligning and Spacing
Fine-tune the alignment and spacing of the text using the options in the Character Panel or the options bar at the top of the screen. Adjusting the tracking (letter spacing) can be particularly useful to ensure even distribution along the circle.
Section 4: Transforming and Distorting
4.1 Free Transform
To further enhance the circular text, use the Free Transform tool (Ctrl + T or Command + T). Right-click on the text layer and choose “Free Transform.” Adjust the handles while holding down the Shift key to maintain proportions. This step allows you to tweak the orientation and placement of the circular text.
4.2 Distort for Perspective
For a more dynamic effect, right-click during Free Transform and select “Distort.” This allows you to pull and adjust the corners of the text independently, introducing a subtle perspective and curvature to the circular arrangement.
Section 5: Adding Visual Flair
5.1 Layer Styles
Elevate your circular text by applying layer styles. Right-click on the text layer, go to “Blending Options,” and experiment with options like Drop Shadow, Outer Glow, or Bevel & Emboss. These styles can add depth and visual interest to your circular text.
5.2 Color and Gradient
Explore different color schemes or gradients to infuse vibrancy into your circular text. Use the Color Overlay option in the Blending Options to apply a solid color, or experiment with gradients for a more dynamic appearance.
Section 6: Breaking the Circle
6.1 Editing the Text
If your design requires breaking the circular arrangement at a specific point, simply edit the text. Place the cursor where you want the break, press Enter to create a line break, and type the remaining text. This technique is useful for designs where a portion of the text follows a different path.
6.2 Adjusting Individual Characters
For precise adjustments, you can also use the Direct Selection Tool (A) to select and move individual characters. This way, you have full control over the placement of each letter within the circular arrangement.
Section 7: Saving and Exporting
7.1 Save Your Project
Before finalizing your design, save your Photoshop project (PSD file) to preserve all layers and settings. This allows for future edits and adjustments.
7.2 Exporting for Different Purposes
When ready to share or use your circular text, consider exporting it in a suitable format. For web use, PNG or JPEG are common choices, while for print, consider formats like TIFF or PDF to ensure high resolution.
Section 8: Advanced Techniques
8.1 Warping for Artistic Effects
For more intricate designs, experiment with the Warp Text option. Right-click on the text layer, go to “Warp Text,” and choose from various warp styles like Arc, Bulge, or Flag. This adds a dynamic and artistic twist to your circular text.
8.2 Blending Multiple Circles
Create a visually stunning effect by blending multiple circles with different text. Repeat the process for each circle, adjusting the size and orientation. This technique is particularly effective for designs that demand a layered and textured look.
Conclusion: Circular Mastery Unveiled
Mastering the art of typing in a circle in Photoshop opens up a realm of creative possibilities for designers. Whether you’re crafting logos, decorative elements, or unique typography, the circular text technique adds a touch of sophistication to your visual creations. By seamlessly aligning text along a circular path, you can achieve designs that captivate and elevate your projects to new aesthetic heights. So, dive into Photoshop, unleash your creativity, and let your text gracefully dance along the elegant curves of a circle!


