Mastering the 3-Point Curve Tool in CorelDRAW: A Comprehensive Guide
Introduction:
In the world of vector graphic design, mastering the use of drawing tools is essential for creating precise and visually appealing artwork. CorelDRAW, a leading vector graphics editor, offers a variety of drawing tools to accommodate different design needs and preferences. Among these tools is the 3-Point Curve tool, which allows designers to create smooth and elegant curves with ease and precision. In this extensive guide, we will delve into the intricacies of using the 3-Point Curve tool in CorelDRAW, exploring techniques, tips, and best practices to help you unlock its full potential and enhance your design projects.
Understanding the 3-Point Curve Tool:
The 3-Point Curve tool in CorelDRAW is a versatile drawing tool that allows designers to create curves using three control points. Unlike other curve drawing tools that require additional control handles to manipulate curve segments, the 3-Point Curve tool simplifies the process by allowing users to define curves with just three clicks. This makes it ideal for creating smooth and precise curves quickly and efficiently.
Using the 3-Point Curve Tool:
Here’s a step-by-step guide to using the 3-Point Curve tool in CorelDRAW:
- Open CorelDRAW and create a new document or open an existing one.
- Select the 3-Point Curve tool from the toolbox. It is usually located in the same group as the Bezier tool.
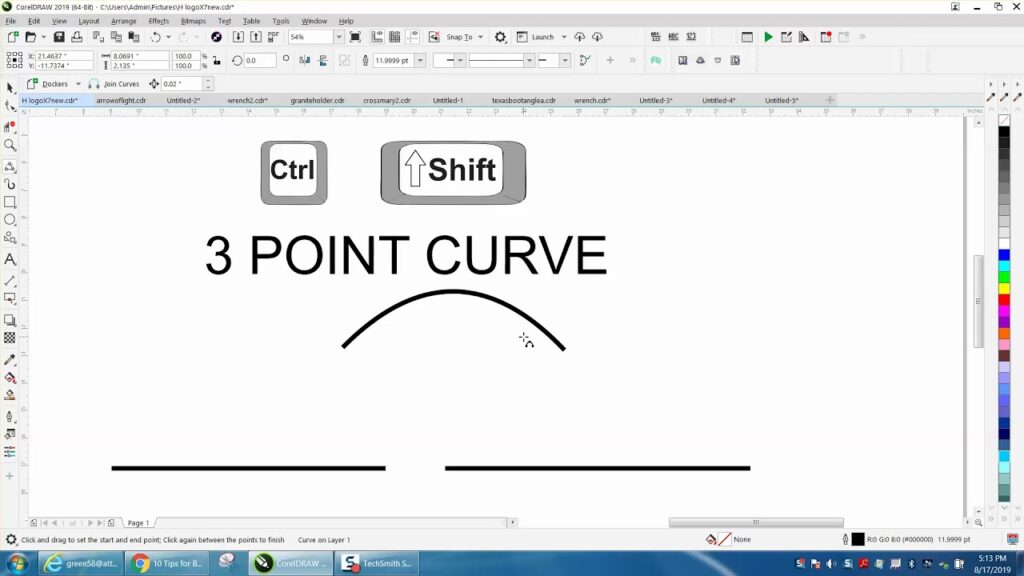
- Click on the canvas to place the first control point of the curve.
- Click again to place the second control point. As you move the cursor, you will see a preview of the curve segment.
- Click a third time to place the third control point and complete the curve. CorelDRAW will automatically interpolate the curve between the three points, creating a smooth and elegant curve.
- To adjust the shape of the curve, you can click and drag any of the control points to reposition them. You can also use the Shape tool (shortcut: F10) to further refine the curve by manipulating the control points and curve segments.
- Once you’re satisfied with the curve, you can adjust its attributes, such as color, thickness, and style, using the Outline Pen or Outline section in the Properties docker.
Tips and Best Practices:
- Practice Control Point Placement: Experiment with different placements of the three control points to create various curve shapes and styles. The position of each control point determines the curvature and direction of the curve segment.
- Use Minimal Control Points: To achieve smooth and elegant curves, try to use as few control points as possible while still capturing the desired shape. Too many control points can lead to unnecessary complexity and make it difficult to edit the curve.
- Combine with Other Tools: The 3-Point Curve tool can be combined with other drawing tools and techniques in CorelDRAW to create complex shapes and designs. Experiment with combining 3-Point curves with straight lines, Bezier curves, shapes, and text to create unique and visually appealing artwork.
- Fine-Tune with the Shape Tool: Use the Shape tool (shortcut: F10) to fine-tune the shape of the curve by manipulating the control points and curve segments. This allows for precise control over the curvature and smoothness of the curve.
Conclusion:
The 3-Point Curve tool in CorelDRAW is a powerful and versatile drawing tool that simplifies the process of creating smooth and elegant curves. By understanding how to use the tool effectively and adhering to best practices, designers can create precise and visually appealing artwork with ease. Whether creating logos, illustrations, or technical drawings, the ability to draw curves with precision and efficiency is essential for achieving professional-quality results. So, dive in, practice regularly, and unlock the full potential of the 3-Point Curve tool in CorelDRAW to enhance your design projects and inspire your creativity.