Unveiling the Foundation: An In-Depth Exploration of Photoshop Layers – The Background Layer
Introduction:
In the vast universe of Adobe Photoshop, layers stand as the backbone of creative freedom, enabling users to manipulate, blend, and refine their digital compositions. At the core of this layered architecture lies the Background Layer – the foundational element that shapes the canvas for artistic expression. In this comprehensive guide, we will embark on an in-depth exploration of the Photoshop Background Layer, unraveling its significance, functionalities, and the pivotal role it plays in the realm of digital design. Whether you’re a seasoned designer or a newcomer to the world of Photoshop, understanding the nuances of the Background Layer is essential for unlocking the full potential of your creative endeavors.
Grasping the Essence of Photoshop Layers:
1. Layer-Based Editing Philosophy:
- Building Blocks of Design:
- Photoshop’s layer-based editing philosophy allows users to create compositions by stacking individual layers, each contributing to the final visual narrative.
- Non-Destructive Editing:
- Layers enable non-destructive editing, providing the flexibility to modify elements without altering the original image.
2. Different Layer Types:
- Background Layer Defined:
- The Background Layer serves as the default base layer in Photoshop, acting as the canvas upon which all other layers are placed.
- Locked by Default:
- Unlike other layers, the Background Layer is locked by default, restricting certain transformations and edits.
Unpacking the Background Layer:
1. Default Characteristics:
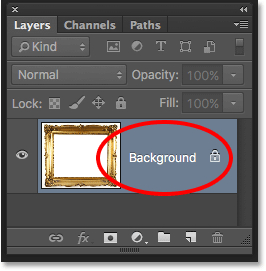
- Naming Convention:
- The Background Layer is often labeled as “Background” in the Layers panel, denoting its default status.
- Locked State:
- This layer is locked to preserve the original image integrity, preventing accidental modifications.
2. Background Layer Options:
- Conversion Possibilities:
- The Background Layer can be converted into a regular layer by double-clicking on it. This conversion unlocks advanced editing options.
- Transparency:
- After conversion, the layer can support transparency, allowing for more complex compositions.
3. Creating a New Background Layer:
- Via the “New” Command:
- Users can create a new Background Layer by selecting the “New” command from the Layer menu. This is useful for starting a fresh canvas.
- Solid Color Background:
- A new Background Layer can also be filled with a solid color, creating a backdrop for design projects.
Working with the Background Layer:
1. Unlocking and Editing:
- Conversion Process:
- To unlock and edit the Background Layer, simply double-click on it or choose “Layer > New > Layer from Background.” This allows for unrestricted editing.
- Transformations:
- Once unlocked, the Background Layer supports transformations such as scaling, rotating, and skewing.
2. Applying Adjustments:
- Adjustment Layers:
- Users can apply adjustment layers directly to the Background Layer, affecting the entire composition. This is useful for global adjustments like color correction or tonal enhancements.
- Smart Filters:
- Convert the Background Layer into a Smart Object to apply non-destructive filters, preserving the original image data.
Practical Applications:
1. Photo Retouching:
- Retaining Original Quality:
- When retouching photos, keeping essential elements on the Background Layer ensures that the original image quality is maintained.
- Global Adjustments:
- Apply global adjustments such as contrast or saturation directly to the Background Layer for an overall effect.
2. Graphic Design Projects:
- Starting Point:
- In graphic design, the Background Layer often serves as the starting point for creating layouts, providing a canvas for text, images, and other design elements.
- Color Schemes:
- Designers can experiment with various solid color backgrounds on the Background Layer to establish the tone and mood of their projects.
Advanced Techniques:
1. Layer Masks:
- Refined Editing:
- Apply layer masks to the Background Layer for selective edits. This allows users to control which areas of the image are affected by adjustments or filters.
- Creating Composites:
- Use layer masks to blend the Background Layer seamlessly with other layers, creating complex composites.
2. Clipping Masks:
- Focused Edits:
- Utilize clipping masks to restrict adjustments or designs to specific areas on the Background Layer. This ensures focused edits without affecting the entire composition.
3. Adding Textures:
- Textured Backgrounds:
- Enhance the Background Layer by incorporating textures or patterns, adding depth and visual interest to the overall design.
Troubleshooting and Tips:
1. Background Layer Locked:
- Unlocking:
- If you need to unlock the Background Layer, simply double-click on it or choose “Layer > New > Layer from Background.”
2. Limited Transparency:
- Conversion to Regular Layer:
- To enable transparency on the Background Layer, convert it to a regular layer. This is especially useful when working on compositions that require see-through elements.
3. Preserving Originals:
- Smart Objects:
- Convert the Background Layer into a Smart Object before applying filters or adjustments to preserve the original image data.
Conclusion:
The Background Layer in Photoshop serves as the canvas upon which artistic visions come to life. Understanding its fundamental characteristics, unlocking its potential, and integrating it seamlessly into your workflow are essential steps in mastering the art of layer-based editing.
As you embark on your creative journey with Photoshop, remember that the Background Layer is not merely a static backdrop but a dynamic starting point for limitless possibilities. Whether you’re retouching photos, designing graphics, or creating intricate compositions, the Background Layer stands as the foundation on which your creative endeavors flourish. Embrace its power, experiment with advanced techniques, and witness the transformation of your digital designs into captivating works of art. Happy editing!


