Unveiling Artistry: A Comprehensive Guide to Textured Text Effects in Photoshop

Introduction:
In the vast landscape of digital design, the marriage of typography and texture stands as a testament to the boundless creativity that Adobe Photoshop enables. Textured text effects add depth, dimension, and a tactile quality to your designs, transforming plain letters into visually engaging elements. In this exhaustive guide, we will embark on a journey through the intricate steps, techniques, and creative possibilities of achieving stunning textured text effects in Photoshop, unlocking a world where words become a canvas for rich and expressive textures.
Understanding the Essentials:
Before diving into the intricacies of textured text effects, it’s essential to familiarize yourself with the foundational tools and concepts in Photoshop.
- Layer Styles: Layer styles are your gateway to enhancing the appearance of text. Elements such as Bevel & Emboss, Inner Shadow, and Gradient Overlay are instrumental in creating textured effects.
- Brush Tool: The Brush tool, accompanied by an array of texture brushes, allows you to paint and blend textures seamlessly onto your text. Experiment with different brush sizes, opacities, and blending modes for diverse effects.
- Textures and Patterns: Photoshop offers an extensive library of textures and patterns, and you can also import your own. These textures serve as the building blocks for creating intricate and visually appealing text effects.
- Blending Modes: Mastering blending modes is crucial for seamlessly integrating textures with text. Experiment with modes like Overlay, Multiply, and Soft Light to achieve the desired visual impact.
Step-by-Step Guide:
Let’s embark on a step-by-step journey to unlock the secrets of creating textured text effects in Photoshop. This comprehensive guide covers essential techniques and offers creative insights for your design endeavors.
Step 1: Setting the Stage
- Open a New Document: Launch Photoshop and create a new document with dimensions that suit your project. Consider factors like resolution, color mode, and canvas size based on your intended use.
- Background Layer: Establish a background layer, either a solid color or a gradient, to provide a foundation for your textured text.
Step 2: Crafting Your Text
- Text Tool: Select the Text tool and type out the text you want to apply the textured effect to. Experiment with different fonts, sizes, and styles to find the perfect fit for your design.
- Rasterize Text: Right-click on the text layer and choose “Rasterize Type.” This step is essential for applying layer styles and blending textures seamlessly.
Step 3: Layer Styles for Depth
- Bevel & Emboss: Apply the Bevel & Emboss layer style to create a sense of depth and dimensionality to your text. Adjust settings like Depth, Size, and Soften to achieve the desired effect.
- Inner Shadow: Use Inner Shadow to add a subtle shadow within the contours of the text. Adjust opacity, distance, and size to control the intensity and direction of the shadow.
- Gradient Overlay: Apply a Gradient Overlay to introduce color variations within the text. Experiment with different gradient styles and colors to enhance the overall visual appeal.
Step 4: Texture Integration
- Texture Brushes: Select a texture brush from the extensive collection available in Photoshop or import your own. Set the brush opacity to a low value and experiment with different brush sizes.
- Painting Texture: Using the Brush tool, paint over the text with the chosen texture. Vary the pressure and strokes to create an organic and nuanced textured effect. Try using different brushes for diverse textures within the same text.
Step 5: Blending Modes and Opacity
- Blending Modes: Experiment with blending modes for both the textured layer and the original text layer. Overlay, Multiply, and Soft Light are particularly effective in blending textures seamlessly.
- Opacity Adjustment: Fine-tune the overall intensity of the textured effect by adjusting the opacity of the textured layer. This step allows you to strike the perfect balance between the text and the applied texture.
Step 6: Layer Effects and Refinements
- Drop Shadow: Add a subtle Drop Shadow to your textured text to further enhance its prominence. Adjust settings like opacity, distance, and size to achieve the desired shadow effect.
- Color Adjustments: Experiment with color adjustments, such as Hue/Saturation and Color Balance, to fine-tune the overall color scheme of your textured text. This step allows for greater customization and artistic expression.
Step 7: Fine-Tuning and Detailing
- Eraser Tool: Refine the textured effect by using the Eraser tool with a soft brush. This allows you to selectively remove portions of the texture, creating a more nuanced and controlled appearance.
- Additional Details: Consider adding additional details or elements to enhance the overall composition. This could include small embellishments, patterns, or even subtle gradients to elevate the visual impact.
Step 8: Final Touches and Export
- Merge Layers: Once satisfied with the textured text effect, merge the visible layers or group them for easier management.
- Save and Export: Save your work in a format that preserves layers (like PSD) for future editing. If your project is finalized, export it in the desired format for sharing, printing, or web use.
Creative Inspirations:
Textured text effects offer a playground for creativity, and the possibilities are virtually endless. Here are some creative ideas to inspire your textured text endeavors:
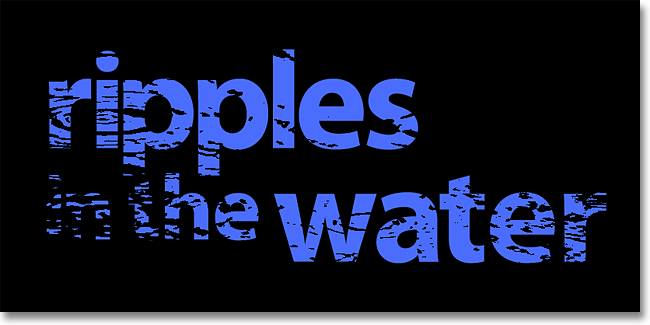
- Nature-Inspired Textures: Infuse your text with textures inspired by elements of nature, such as wood grains, leaves, or water ripples, creating a harmonious blend of typography and organic textures.
- Grunge Aesthetics: Embrace the edgy and raw appeal of grunge textures. Experiment with distressed patterns, scratches, and rough surfaces to add a gritty and rebellious vibe to your text.
- Metallic Elegance: Achieve a sleek and sophisticated look by incorporating metallic textures into your text. Experiment with gold, silver, or copper textures to create a luxurious and glamorous effect.
- Paper and Fabric Textures: Mimic the tactile feel of paper or fabric by integrating corresponding textures into your text. This approach adds a tactile quality, evoking a sense of touch in a digital medium.
- Watercolor Splashes: Introduce the fluidity and vibrancy of watercolor textures to your text. This creates a dynamic and artistic effect, especially effective for projects with a painterly aesthetic.
Conclusion:
Mastering textured text effects in Photoshop opens a realm of artistic possibilities, allowing you to elevate your designs and captivate your audience. As you explore the techniques outlined in this guide, remember that experimentation is key to discovering your unique style. Whether you opt for subtle and refined textures or bold and avant-garde effects, textured text in Photoshop is a canvas for your imagination.
Harness the power of layer styles, brushes, and blending modes to breathe life into your typography. From the intricate details of texture integration to the final touches that refine your masterpiece, textured text effects represent the convergence of design and artistry in the digital realm. Embrace the journey of transforming plain text into a visually striking and textured masterpiece, and let your creativity soar in the boundless expanse of textured typography. Happy creating!


