Forged Elegance: A Comprehensive Guide to Crafting Metal Text Effects in Photoshop
Adam.Smith February 9, 2024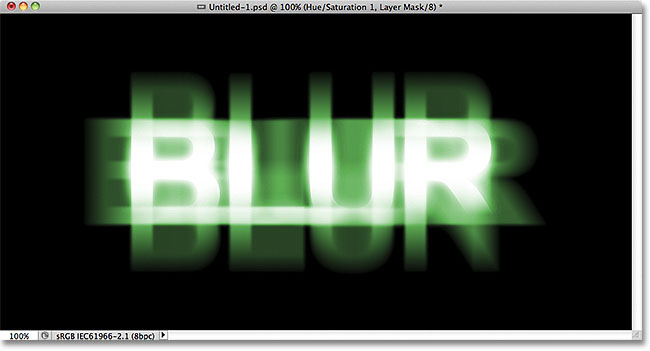
Introduction:
In the ever-evolving landscape of digital design, the allure of metallic aesthetics captivates the eye and imparts a sense of sophistication and elegance. Adobe Photoshop, with its arsenal of tools and features, allows designers to seamlessly translate the lustrous essence of metal onto text. This comprehensive guide will take you on a journey through the step-by-step process, advanced techniques, and creative possibilities of crafting mesmerizing metal text effects in Photoshop. Let’s delve into the world of virtual metallurgy and transform your text into a shining testament of digital craftsmanship.
Understanding the Essentials:
Before embarking on the creative journey of crafting metal text effects, it’s crucial to familiarize yourself with fundamental tools and concepts in Adobe Photoshop.
- Layer Styles: Layer styles are the building blocks for achieving realistic metal effects. Elements such as Bevel & Emboss, Inner Shadow, and Gradient Overlay play pivotal roles in creating the illusion of depth and shine.
- Brush Tool: The Brush tool, complemented by various metallic brushes or custom brushes, allows for detailed customization and the addition of intricate textures to simulate metal surfaces.
- Blending Modes: Understanding blending modes is crucial for achieving seamless integration of metallic textures with underlying layers. Experiment with modes like Overlay, Soft Light, and Color Dodge for different visual effects.
- Adjustment Layers: Adjustment layers enable fine-tuning of color, contrast, and saturation, contributing to the overall realism of the metal effect.
Step-by-Step Guide:
Let’s embark on a detailed exploration of the step-by-step process to achieve stunning metal text effects in Photoshop. This guide covers essential techniques and offers insights into creating diverse and captivating metal finishes.
Step 1: Setting the Stage
- Open a New Document: Launch Photoshop and create a new document with dimensions that suit your project. Consider factors like resolution, color mode, and canvas size based on your intended use.
- Background Layer: Establish a background layer, which can be a solid color, gradient, or a textured image. The background sets the tone for the overall composition.
Step 2: Crafting Your Text
- Text Tool: Select the Text tool and type out the text you want to apply the metal effect to. Experiment with different fonts, sizes, and styles to find the perfect fit for your design.
- Rasterize Text: Right-click on the text layer and choose “Rasterize Type.” This step is essential for applying layer styles and advanced effects.
Step 3: Applying Base Layer Styles
- Bevel & Emboss: Apply Bevel & Emboss layer style to create the illusion of three-dimensional depth. Adjust settings like Depth, Size, and Soften to achieve a subtle or pronounced beveled effect.
- Inner Shadow: Use Inner Shadow to add depth within the contours of the text. Adjust opacity, distance, and size to create a realistic shadow effect.
Step 4: Adding Metallic Texture
- Metallic Brushes: Utilize metallic brushes or custom brushes that mimic metal textures. These brushes can be found online or created by modifying existing brushes in Photoshop.
- Brush Tool Application: With the Brush tool, paint over the text using metallic brushes. Vary brush size, opacity, and flow to add texture and detail. Experiment with different strokes to achieve a realistic metal surface.
Step 5: Introducing Highlights and Shadows
- Dodge and Burn Tools: Use the Dodge tool to selectively lighten areas of the text where light would naturally hit. Conversely, use the Burn tool to darken areas that would be in shadow, enhancing the metallic shine.
Step 6: Fine-Tuning with Adjustment Layers
- Hue/Saturation Adjustment: Apply a Hue/Saturation adjustment layer to tweak the overall color tone of the metal effect. Experiment with sliders to achieve the desired hue and saturation.
- Levels Adjustment: Fine-tune the contrast and brightness of the metal effect using a Levels adjustment layer. Adjust the input levels to enhance the highlights and shadows.
Step 7: Adding Realistic Reflections
- Duplicate and Flip Text: Duplicate the text layer, and flip the duplicate vertically. Position it below the original text to simulate a reflective surface.
- Opacity and Blurring: Reduce the opacity of the duplicated text layer and apply a Gaussian Blur to create a soft reflection effect. Adjust the opacity to control the intensity of the reflection.
Step 8: Final Touches and Export
- Merge Layers: Once satisfied with the metal text effect, merge the visible layers or group them for easier management.
- Save and Export: Save your work in a format that preserves layers (like PSD) for future editing. If your project is finalized, export it in the desired format for sharing, printing, or web use.
Creative Inspirations:
Metal text effects offer a broad spectrum of creative possibilities. Here are some ideas to spark your inspiration:
- Silver Elegance: Create a sleek and modern silver text effect for an elegant and refined aesthetic. Experiment with subtle highlights and shadows to enhance the metallic luster.
- Gold Luxe: Craft a luxurious gold text effect by using warm hues and rich textures. Add a touch of glamour with pronounced bevels and reflections.
- Bronze Patina: Embrace a vintage or rustic vibe by applying a bronze patina to your text. Experiment with weathered textures and nuanced color variations for an aged appearance.
- Chrome Futurism: Achieve a futuristic look with a chrome text effect. Experiment with high-contrast highlights and sharp reflections for a polished and cutting-edge appearance.
- Copper Warmth: Infuse warmth into your design with a copper text effect. Utilize warm tones and subtle textures to create a cozy and inviting aesthetic.
Conclusion:
Crafting metal text effects in Photoshop opens a gateway to a world where letters transform into gleaming, three-dimensional masterpieces. As you navigate the intricate steps outlined in this guide, remember that creativity knows no bounds. Each project is an opportunity to explore, experiment, and push the boundaries of virtual metallurgy.
Harness the power of layer styles, brushes, and adjustment layers to breathe life into your typography. From the initial steps of setting the stage to the final touches that refine your metallic masterpiece, the journey of creating metal text effects in Photoshop is a testament to the fusion of artistry and technology. Embrace the digital forge, and let your creativity shine in the luminous expanse of metal typography. Happy creating!
Title: Ethereal Elegance: A Comprehensive Guide to Crafting Ghostly Blur Text Effects in Photoshop
Introduction:
In the realm of digital design, the intersection of creativity and technology allows for the manifestation of ethereal and otherworldly effects. The Ghostly Blur Text Effect in Photoshop is a mesmerizing technique that brings a sense of mystery and dreaminess to your typographic endeavors. This comprehensive guide will lead you through the intricate steps, advanced techniques, and creative possibilities of crafting Ghostly Blur Text Effects, transforming plain text into an ethereal masterpiece that appears to hover in a spectral haze.
Understanding the Core Concepts:
Before embarking on the journey of creating Ghostly Blur Text Effects, it’s essential to familiarize yourself with fundamental tools and concepts in Adobe Photoshop.
- Layer Styles: Layer styles are foundational for creating depth and dimension. Elements like Bevel & Emboss, Inner Glow, and Gradient Overlay play crucial roles in achieving a ghostly appearance.
- Blurring Techniques: Mastering blurring techniques is central to creating the ethereal, ghostly effect. Photoshop offers various blur filters, such as Gaussian Blur and Motion Blur, each contributing to a different aspect of the ghostly aesthetic.
- Adjustment Layers: Adjustment layers enable you to fine-tune the color, contrast, and saturation of your text, enhancing the overall ghostly atmosphere.
- Opacity and Fill: Adjusting opacity and fill levels allows you to control the transparency of your text, a key factor in creating a ghostly presence.
Step-by-Step Guide:
Let’s embark on a comprehensive journey to unlock the secrets of crafting Ghostly Blur Text Effects in Photoshop. This guide covers essential techniques and offers insights into creating a hauntingly beautiful typographic masterpiece.
Step 1: Setting the Scene
- Open a New Document: Launch Photoshop and create a new document with dimensions that suit your project. Consider factors like resolution, color mode, and canvas size based on your intended use.
- Background Layer: Establish a background layer, either a solid color, gradient, or an atmospheric image. This layer sets the tone for the ghostly ambiance.
Step 2: Crafting Your Text
- Text Tool: Select the Text tool and type out the text you want to apply the ghostly blur effect to. Experiment with different fonts, sizes, and styles to match the haunting atmosphere you wish to convey.
- Rasterize Text: Right-click on the text layer and choose “Rasterize Type.” This step is essential for applying layer styles and advanced effects.
Step 3: Applying Base Layer Styles
- Bevel & Emboss: Apply Bevel & Emboss layer style to add depth to the text. Adjust settings like Depth, Size, and Soften to create a subtle three-dimensional effect.
- Inner Glow: Use Inner Glow to create a soft halo around the text. Experiment with opacity, size, and color to achieve a gentle luminosity.
Step 4: Adding Initial Blurring
- Gaussian Blur: Apply a Gaussian Blur filter to the text layer. Adjust the radius to create a preliminary blurring effect. This step sets the foundation for the ghostly appearance.
Step 5: Motion Blur for Movement
- Motion Blur: Introduce a sense of movement to the ghostly text by applying a Motion Blur filter. Experiment with the angle and distance settings to simulate a subtle drifting effect.
Step 6: Adjusting Opacity and Fill
- Opacity Adjustment: Lower the opacity of the text layer to control its transparency. This step contributes to the ghostly, semi-transparent quality.
- Fill Adjustment: Experiment with the fill level of the text layer. Adjusting the fill allows you to control the transparency while maintaining the visibility of layer styles.
Step 7: Fine-Tuning with Adjustment Layers
- Hue/Saturation Adjustment: Apply a Hue/Saturation adjustment layer to tweak the overall color tone of the ghostly text. Experiment with sliders to achieve the desired spectral hues.
- Levels Adjustment: Fine-tune the contrast and brightness of the ghostly text using a Levels adjustment layer. Adjust the input levels to enhance the ethereal glow.
Step 8: Adding Atmospheric Elements
- Additional Layers: Introduce elements like mist, smoke, or light beams on separate layers. Experiment with blending modes and opacity to seamlessly integrate these atmospheric elements with the ghostly text.
- Glowing Highlights: Enhance the ghostly effect by adding subtle glowing highlights to certain areas of the text. Use a soft brush with a low opacity to paint highlights that mimic an otherworldly glow.
Step 9: Final Touches and Export
- Merge Layers: Once satisfied with the ghostly blur text effect, merge the visible layers or group them for easier management.
- Save and Export: Save your work in a format that preserves layers (like PSD) for future editing. If your project is finalized, export it in the desired format for sharing, printing, or web use.
Creative Inspirations:
Ghostly blur text effects offer a myriad of creative possibilities. Here are some ideas to spark your inspiration:
- Phantom Typography: Create text that appears to materialize from thin air, with a ghostly trail following each letter.
- Spectral Mist: Craft a haunting atmosphere by incorporating mist or fog around the text, evoking a sense of mystery and intrigue.
- Ephemeral Whispers: Experiment with delicate and wispy text that conveys the ephemeral nature of a ghostly presence.
- Enchanted Typography: Infuse a touch of magic by adding subtle sparkles or glowing particles around the ghostly text, creating an enchanted ambiance.
- Floating Haunt: Create a surreal effect by making the text appear as if it’s floating or suspended in mid-air, defying the laws of gravity.
Conclusion:
Mastering the art of Ghostly Blur Text Effects in Photoshop allows you to weave a narrative of spectral elegance and ethereal beauty. As you explore the techniques outlined in this guide, remember that the true magic lies in your creativity and willingness to experiment.
Harness the power of layer styles, blurring filters, and atmospheric elements to breathe life into your typography. From the initial steps of setting the scene to the final touches that refine your ghostly masterpiece, the journey of creating Ghostly Blur Text Effects is a testament to the captivating fusion of design and otherworldly aesthetics. Embrace the digital ethereal realm, and let your creativity transcend the boundaries of the tangible. Happy haunting!


