Mastering Illumination: Casting Light from a Window with Photoshop
Introduction:
In the realm of digital artistry and photo manipulation, the ability to convincingly cast light from a window is a skill that can elevate your compositions to new levels of realism and visual impact. Adobe Photoshop, a powerhouse in creative design, offers a myriad of tools and techniques to simulate natural light streaming through a window. This in-depth guide will navigate you through the step-by-step process, empowering you to harness the illuminating power of Photoshop and infuse your images with the warmth and authenticity of natural window light.
Section 1: Analyzing Natural Light
Step 1: Understanding the Characteristics of Window Light:
Before delving into the digital realm, grasp the fundamental characteristics of natural window light. Consider factors such as direction, intensity, and color temperature, as these elements will inform your approach when casting light in Photoshop.
Step 2: Observing Real-world Examples:
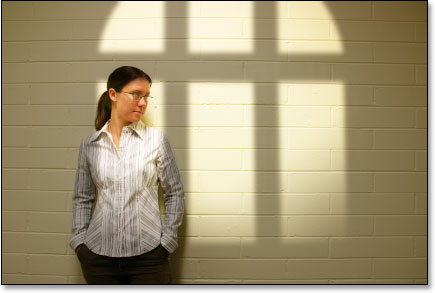
Study photographs or real-world scenes with natural window light. Pay attention to how light interacts with surfaces, creates shadows, and imparts a distinct atmosphere. This observational phase lays the groundwork for replicating the nuances of window light in your digital compositions.
Section 2: Selecting an Appropriate Image
Step 1: Choosing a Suitable Base Image:
Select an image that aligns with your vision for incorporating window light. Whether it’s a portrait, a still life, or a landscape, ensure that the chosen image has elements that can convincingly interact with the simulated light source.
Step 2: Assessing Existing Light Conditions:
Evaluate the existing lighting conditions within your chosen image. Identify areas where window light can be realistically introduced and consider the impact it will have on the overall mood and atmosphere of the scene.
Section 3: Opening and Preparing Your Image in Photoshop
Step 1: Importing Your Image:
Launch Adobe Photoshop and open your chosen image. Familiarize yourself with the layers panel, adjustment layers, and other essential tools that will be instrumental in the process of casting light.
Step 2: Duplicating and Organizing Layers:
Create a duplicate of your background layer to preserve the original image. Organize your layers systematically, allowing for a non-destructive workflow as you introduce and refine the window light.
Section 4: Creating a Window Opening
Step 1: Selecting the Area for the Window:
Use selection tools such as the rectangle or lasso tool to outline the area where you want the window to be. This selection will serve as the basis for introducing light into your composition.
Step 2: Feathering and Refining the Selection:
To achieve a natural transition between the window and the surrounding space, feather the selection. Refine the edges to seamlessly integrate the window opening into the existing environment.
Section 5: Introducing the Light Source
Step 1: Adding a New Layer for Light:
Create a new layer above the background layers. This layer will serve as the canvas for painting in the window light. Choose a soft brush and set the color to a warm, natural hue that aligns with the characteristics of sunlight.
Step 2: Painting in the Light:
With the new layer selected, begin painting in the window light. Focus on the areas where light would naturally fall, such as surfaces facing the window and objects directly in its path. Use varying opacities to simulate the gradual falloff of light.
Section 6: Adjusting Light Intensity and Color
Step 1: Utilizing Adjustment Layers:
Fine-tune the intensity and color of the window light by incorporating adjustment layers. Experiment with brightness, contrast, and color balance adjustments to achieve a harmonious blend between the simulated light and the existing scene.
Step 2: Incorporating Gradient Maps:
For a nuanced control over color temperature, consider adding gradient maps. This allows you to introduce subtle shifts in color within the illuminated areas, mimicking the warmth of sunlight filtering through a window.
Section 7: Creating Shadows and Highlights
Step 1: Shadow Casting:
To enhance the realism of your window light, introduce shadows cast by objects within the scene. Create new layers and use soft brushes with reduced opacity to paint in shadows, paying attention to the direction of light.
Step 2: Highlighting Surfaces:
Accentuate the interaction between light and surfaces by painting highlights. Focus on areas where direct sunlight would intensify, such as edges of objects and surfaces directly facing the window. This step adds depth and dimension to your composition.
Section 8: Refining Details and Texture
Step 1: Texture and Detail Enhancement:
To mimic the intricate interplay of light and texture, use tools like the dodge and burn brushes. These tools allow you to selectively lighten or darken areas, emphasizing texture and detail within the illuminated regions.
Step 2: Adjusting Layer Opacity:
Fine-tune the overall impact of your window light by adjusting the opacity of the layers. This step enables you to strike the right balance between the added illumination and the ambient lighting conditions within the scene.
Section 9: Creating Light Spill and Reflections
Step 1: Simulating Light Spill:
For a realistic portrayal of window light, consider introducing light spill onto adjacent surfaces. Create new layers and paint subtle washes of light on walls, floors, or objects adjacent to the window, capturing the spillage effect.
Step 2: Reflective Surfaces and Glows:
Objects near the window may exhibit reflective surfaces or glows from the incoming light. Employ techniques like layer blending modes and opacity adjustments to replicate these effects, enhancing the authenticity of your window light.
Section 10: Finalizing and Exporting
Step 1: Reviewing the Composition:
Take a step back and review the overall composition. Ensure that the introduced window light harmonizes with the existing elements within the scene, contributing to a cohesive and visually compelling image.
Step 2: Exporting for Different Platforms:
Consider the intended use of your final composition – whether it’s for digital art, photography, or design projects. Adjust the file format, resolution, and color profile accordingly before exporting the finished image.
Section 11: Showcasing Your Illuminated Composition
Step 1: Integration into Design Projects:
Incorporate your newly illuminated composition into your design projects seamlessly. Whether it’s for photo manipulation, digital art, or advertising, the window light you’ve created in Photoshop will infuse your creations with a touch of realism and depth.
Step 2: Sharing and Seeking Feedback:
Share your illuminated compositions with peers, clients, or online communities to gather feedback. Use constructive input to refine your techniques, explore variations, and continuously enhance your ability to simulate natural window light in Photoshop.
Conclusion:
Casting light from a window with Photoshop is an artful endeavor that blends technical precision with creative intuition. By understanding the nuances of natural light, meticulously selecting and preparing your images, and skillfully employing Photoshop’s array of tools, you can infuse your compositions with the warmth and authenticity of sunlit windows. As you embark on this journey of illumination, let your creativity guide you, and revel in the transformative power of simulated light that breathes life into your digital canvases.


