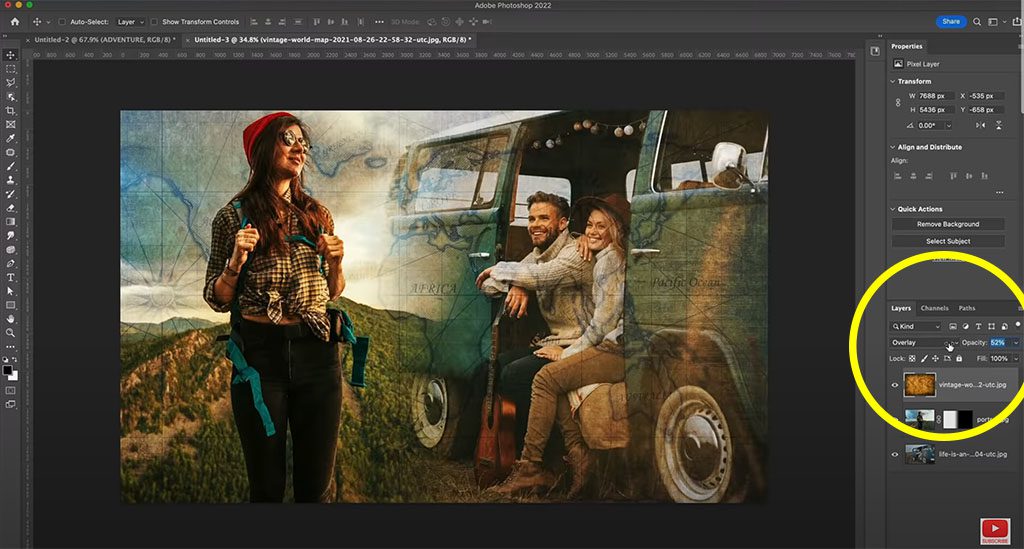
Mastering Artistic Fusion: Blend Photos with Apply Image in Photoshop

Introduction:
In the ever-evolving world of digital artistry, the ability to seamlessly blend photos is a skill that can elevate your creations to new heights. Among the plethora of tools that Adobe Photoshop offers, the “Apply Image” feature stands out as a powerful and nuanced technique for achieving sophisticated blends. This comprehensive guide will take you on a deep dive into the intricacies of blending photos using the Apply Image function in Photoshop, unlocking a realm of creative possibilities that can transform your images into captivating visual narratives.
Section 1: Understanding the Apply Image Feature
Step 1: Unveiling Apply Image:
Apply Image is a sophisticated blending tool in Photoshop that allows artists and designers to merge two images with precision. Unlike traditional blending modes, Apply Image provides granular control over how the blending occurs, making it a valuable asset for intricate compositions.
Step 2: Key Components:
Before delving into the application, it’s essential to grasp the key components of the Apply Image feature. Understanding concepts like source and destination channels, blending modes, and scale can empower you to harness the full potential of this tool.
Section 2: Preparing Your Images for Blending
Step 1: Image Selection and Preparation:
Choosing the right images is the first step in creating a harmonious blend. Whether you’re combining landscapes, portraits, or textures, ensure that the selected images share compatible color profiles and resolutions to avoid distortions during the blending process.
Step 2: Setting the Stage in Photoshop:
Open Photoshop and load the images you intend to blend. Create a new document or use an existing canvas, setting the dimensions and resolution based on your artistic vision. Organize your layers to keep the workflow smooth and efficient.
Section 3: Navigating Through Channels
Step 1: Channel Exploration:
Apply Image operates on the channels of an image – Red, Green, Blue (RGB), and sometimes additional channels like Alpha or Spot Colors. Familiarize yourself with the unique characteristics of each channel, as they play a crucial role in determining the outcome of your blend.
Step 2: Identifying Source and Destination Channels:
In Apply Image, you’ll be working with both source and destination channels. Understanding which channels to target for the blending effect and how to manipulate them will be pivotal in achieving the desired visual impact.
Section 4: Applying Image Blending Modes
Step 1: Choosing the Right Blending Mode:
The blending mode you select in Apply Image significantly influences the final result. Experiment with various modes such as Multiply, Screen, Overlay, or Soft Light to observe how they interact with the source and destination channels, offering diverse aesthetic effects.
Step 2: Fine-Tuning with Opacity and Scale:
To refine the blending, utilize the Opacity slider within Apply Image. Adjusting the opacity allows for subtle blending, providing a nuanced transition between the source and destination images. Additionally, experimenting with the Scale option enables control over the intensity of the blending effect.
Section 5: Advanced Techniques for Apply Image
Step 1: Creating Luminosity Masks:
Luminosity masks are advanced tools that leverage Apply Image for precise blending based on brightness levels. By generating luminosity selections, you can target specific tonal ranges in your images, opening the door to sophisticated and controlled blends.
Step 2: Blending Multiple Channels:
Apply Image’s versatility extends to blending multiple channels simultaneously. This technique enables you to craft intricate blends by combining the strengths of different channels, providing a nuanced approach to image fusion.
Section 6: Real-Life Applications and Examples
Step 1: Landscape Blending for Dramatic Skies:
Explore how Apply Image can enhance landscape photography by blending vibrant skies into your compositions. Achieve seamless transitions between the natural elements, adding drama and intensity to your scenes.
Step 2: Portrait Retouching with Apply Image:
Delve into the realm of portrait retouching using Apply Image. Learn how this tool can be employed to merge high-frequency and low-frequency details, resulting in flawlessly retouched skin while maintaining texture and authenticity.
Section 7: Troubleshooting and Refinement
Step 1: Addressing Common Challenges:
As with any advanced technique, challenges may arise during the blending process. Learn how to troubleshoot issues such as color mismatches, artifacts, or unwanted contrasts, ensuring a smooth and polished final product.
Step 2: Iterative Refinement:
Achieving perfection often involves an iterative approach. Embrace the power of Photoshop’s non-destructive editing capabilities to refine your blends iteratively, making incremental adjustments until you achieve the desired visual impact.
Conclusion:
Blending photos with the Apply Image feature in Photoshop is a journey of artistic exploration and technical mastery. By understanding the intricacies of channels, blending modes, and advanced techniques, you unlock a realm of creative possibilities that can elevate your digital art to unparalleled heights. As you embark on your Apply Image adventures, let your imagination guide you, and don’t be afraid to push the boundaries of what’s possible in the captivating world of photo blending.


