Mastering 3D Art: A Comprehensive Guide to Creating 3D Objects in Adobe Illustrator
Introduction: Creating three-dimensional (3D) objects in Adobe Illustrator adds depth and realism to your artwork, allowing you to bring your designs to life with depth, perspective, and dimension. While Illustrator is primarily known for its vector-based graphics, it also offers powerful tools and features for creating 3D effects. In this extensive guide, we’ll explore the step-by-step process of creating 3D objects in Adobe Illustrator, covering everything from basic shapes to complex designs, with practical tips and creative techniques along the way.
Part 1: Understanding 3D in Adobe Illustrator
- Introduction to 3D Effects: Adobe Illustrator offers several methods for creating 3D effects, including extrusion, revolve, and perspective distortion. These techniques allow users to transform 2D shapes and objects into three-dimensional forms with depth and dimension.
- Accessing 3D Effects: The 3D effects in Adobe Illustrator can be accessed from the Effect menu under the 3D submenu. Users can apply 3D effects to selected objects or shapes, customizing settings such as extrusion depth, rotation angle, and perspective.
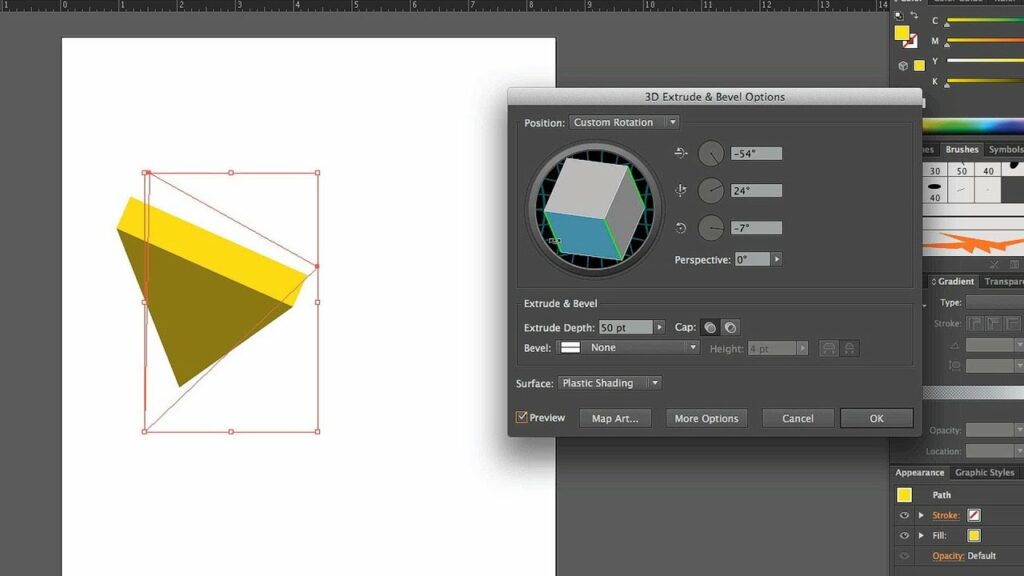
Part 2: Creating Basic 3D Shapes
- Extruding Shapes: Start by creating a basic shape or object using the Shape Tools or the Pen Tool in Adobe Illustrator. Select the shape, then navigate to the Effect menu > 3D > Extrude & Bevel to apply extrusion. Adjust settings such as extrusion depth and angle to customize the 3D effect.
- Revolve Objects: Another method for creating 3D objects is through the revolve effect. Draw a profile of the object using the Pen Tool or any other drawing tool, then select it and navigate to Effect menu > 3D > Revolve. Adjust settings to define the axis and angle of rotation.
Part 3: Advanced 3D Techniques
- Customizing 3D Effects: Experiment with different settings and options in the 3D effect dialog box to customize the appearance of your 3D objects. Adjust lighting, shading, and surface textures to achieve desired results.
- Combining 3D Effects: Combine multiple 3D effects and techniques to create complex and realistic 3D objects. For example, extrude a shape and then apply a revolve effect to add additional depth and dimension.
Part 4: Creative Applications of 3D Objects
- Creating Logos and Icons: Use 3D effects in Adobe Illustrator to create logos, icons, and branding elements with depth and dimension. Experiment with different shapes and styles to achieve unique and memorable designs.
- Designing Illustrations and Artwork: Incorporate 3D objects into illustrations and artwork to add visual interest and realism. Combine 3D shapes with 2D elements to create dynamic compositions with depth and perspective.
Conclusion
Creating 3D objects in Adobe Illustrator opens up a world of creative possibilities, allowing you to add depth, dimension, and realism to your artwork. By mastering the techniques and tips outlined in this guide, you’ll be equipped with the knowledge and skills to create stunning 3D objects that elevate your designs to the next level. Remember to experiment, practice, and explore new techniques to continually improve your 3D design skills in Adobe Illustrator. With dedication and creativity, you can create 3D artwork that captivates viewers and leaves a lasting impression in the world of digital design.


