How to Change a Tire: A Comprehensive Guide
Changing a tire is an essential skill for any driver. Knowing how to change a tire can save you time, money, and stress if you ever find yourself with a flat tire. This comprehensive guide will walk you through the process step by step, from preparing for the task to safely getting back on the road.
Preparation
Before you find yourself in a situation where you need to change a tire, it’s important to be prepared. Here are the key items you should always have in your vehicle:
- Spare Tire: Ensure your spare tire is properly inflated and in good condition.
- Car Jack: A hydraulic or scissor jack is essential for lifting your vehicle.
- Lug Wrench: This tool is necessary for loosening and tightening the lug nuts.
- Wheel Wedges: These help prevent your vehicle from rolling while you’re changing the tire.
- Owner’s Manual: This can provide specific instructions for your vehicle.
- Flashlight: A flashlight is essential for nighttime or low-light situations.
- Gloves: Gloves protect your hands from dirt and provide better grip.
- Reflective Triangle or Flares: These increase your visibility to other drivers, enhancing safety.
- Tire Pressure Gauge: Useful for checking the pressure of your spare tire.
Finding a Safe Location
If you experience a flat tire while driving, follow these steps to ensure you’re in a safe location before changing the tire:
- Slow Down Gradually: Avoid sudden braking. Gradually reduce your speed and look for a safe place to pull over.
- Find a Flat Surface: Park your car on a flat, level surface to prevent it from rolling.
- Move Away from Traffic: Ideally, pull over to a safe spot away from traffic. Avoid soft or unstable ground.
- Turn on Hazard Lights: This signals to other drivers that you are experiencing trouble.
- Engage the Parking Brake: Once parked, engage the parking brake to add an extra layer of safety.
Steps to Change a Tire
1. Secure the Vehicle
Before you begin, ensure your vehicle is securely in place:
- Engage Parking Brake: This helps prevent the vehicle from rolling.
- Use Wheel Wedges: Place these in front of or behind the tires to further secure the vehicle. If changing a front tire, place them behind the rear tires. If changing a rear tire, place them in front of the front tires.
2. Retrieve the Spare Tire and Tools
Locate your spare tire, car jack, and lug wrench:
- Consult Owner’s Manual: If you’re unsure where these items are located, refer to your owner’s manual.
- Gather Tools: Retrieve the jack, lug wrench, and spare tire from your vehicle.
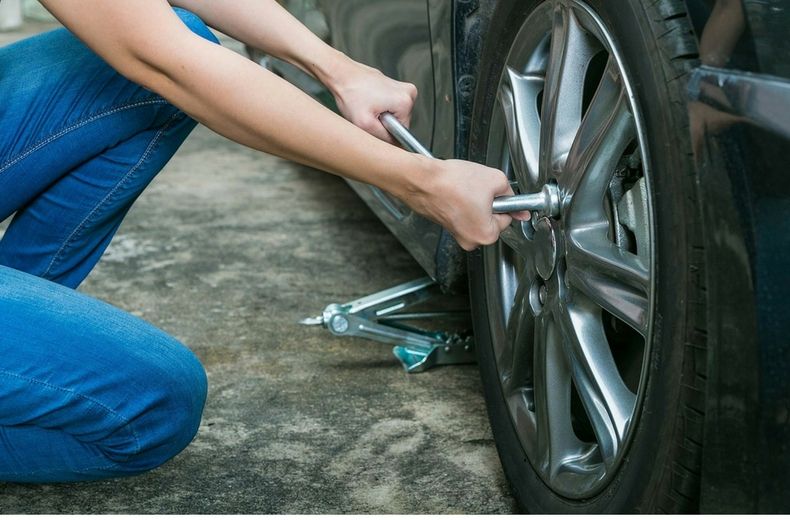
3. Loosen the Lug Nuts
Before jacking up the car, slightly loosen the lug nuts on the flat tire:
- Remove Hubcap: If your car has a hubcap covering the lug nuts, remove it first.
- Use Lug Wrench: Place the lug wrench on a lug nut and turn it counterclockwise. Loosen each lug nut about a quarter to a half turn, but do not remove them completely.
4. Jack Up the Vehicle
Carefully lift the vehicle using the car jack:
- Place the Jack: Position the jack under the vehicle frame near the flat tire. Check your owner’s manual for the correct jacking point.
- Raise the Vehicle: Use the jack to lift the vehicle until the flat tire is about six inches off the ground. Ensure the jack is stable and the vehicle is secure.
5. Remove the Lug Nuts and Flat Tire
Once the vehicle is lifted, you can remove the lug nuts and the flat tire:
- Remove Lug Nuts: Finish loosening and removing the lug nuts. Keep them in a safe place as you’ll need them later.
- Remove the Flat Tire: Grasp the tire and pull it straight toward you. Set it aside.
6. Mount the Spare Tire
Install the spare tire onto the vehicle:
- Align the Spare Tire: Line up the holes in the spare tire with the lug nut posts on the wheel hub.
- Push the Tire Onto the Hub: Push the spare tire onto the wheel hub until it is flush against the hub.
7. Tighten the Lug Nuts
Secure the spare tire by tightening the lug nuts:
- Hand-Tighten Lug Nuts: Place the lug nuts back on the lug nut posts and tighten them by hand.
- Use a Star Pattern: Tighten the lug nuts in a star pattern to ensure the tire is evenly secured. Turn each lug nut a few turns at a time until they are snug.
8. Lower the Vehicle
Carefully lower the vehicle back to the ground:
- Lower the Jack: Use the jack to slowly lower the vehicle until the spare tire touches the ground. Remove the jack from under the vehicle.
- Fully Tighten Lug Nuts: Once the vehicle is on the ground, use the lug wrench to fully tighten the lug nuts. Again, use a star pattern to ensure even tightening.
9. Check Tire Pressure
Ensure your spare tire is properly inflated:
- Use Tire Pressure Gauge: Check the pressure of the spare tire using a tire pressure gauge.
- Inflate if Necessary: If the spare tire’s pressure is low, inflate it to the recommended pressure specified in your owner’s manual.
Post-Change Safety Checks
After changing the tire, perform these safety checks before driving:
- Double-Check Lug Nuts: Make sure all lug nuts are securely tightened.
- Secure Flat Tire and Tools: Place the flat tire, jack, and lug wrench back in your vehicle.
- Remove Wheel Wedges: If you used wheel wedges, remove them from the tires.
- Turn Off Hazard Lights: Once you’re ready to drive, turn off your hazard lights.
Driving on a Spare Tire
Spare tires, especially temporary or “donut” spares, are not designed for long-term use. Here are some guidelines for driving on a spare tire:
- Limit Speed: Do not exceed 50 mph (80 km/h) while driving on a spare tire.
- Limit Distance: Drive only as far as necessary to reach a tire repair shop.
- Avoid Highways: If possible, avoid highways and long distances while driving on a spare.
Getting the Flat Tire Repaired
As soon as possible, take your flat tire to a professional to be repaired or replaced. Driving on a spare tire for extended periods can be dangerous and is not recommended.
- Visit a Tire Shop: Take your vehicle to a tire shop to have the flat tire inspected and repaired.
- Replace the Tire if Necessary: If the flat tire is beyond repair, replace it with a new one.
Preventive Measures
To reduce the likelihood of experiencing a flat tire, follow these preventive measures:
- Regularly Check Tire Pressure: Ensure all your tires, including the spare, are properly inflated.
- Inspect Tread Wear: Check the tread wear on your tires and replace them if they are worn.
- Avoid Road Hazards: Be cautious of potholes, debris, and other road hazards that can damage your tires.
- Rotate Tires: Follow your vehicle manufacturer’s recommendations for tire rotation to ensure even wear.
Conclusion
Knowing how to change a tire is a valuable skill that can save you time and stress. By following this comprehensive guide, you can confidently handle a flat tire situation and get back on the road safely. Always be prepared with the necessary tools, and take preventive measures to maintain your tires in good condition. Remember, while changing a tire is a manageable task, seeking professional help for tire repairs or replacements is always a good idea to ensure your safety.


