Precision and Finesse: A Comprehensive Guide on How to Crop Bitmaps in CorelDRAW
Introduction:
CorelDRAW, a versatile graphic design software, empowers users to manipulate and refine images with a broad range of tools. One fundamental yet crucial function is cropping, allowing designers to trim, focus, and enhance specific areas of bitmap images. In this extensive guide, we delve into the intricacies of cropping bitmaps in CorelDRAW, providing step-by-step instructions, advanced techniques, and practical applications to help users master this essential skill for image editing and design.
Section 1: Understanding Bitmap Cropping
- What is Cropping:
- Cropping is the process of cutting away portions of an image to focus on a particular area or to achieve a desired composition.
- In CorelDRAW, cropping is a non-destructive process, allowing users to retain the original image while creating a modified version.
- When to Crop Bitmaps:
- Cropping is useful for eliminating unwanted elements, emphasizing specific details, improving composition, and adjusting aspect ratios.
- It is applied in various design projects, including photo editing, web graphics, print design, and more.
Section 2: Step-by-Step Guide on Cropping Bitmaps in CorelDRAW
- Open CorelDRAW:
- Launch CorelDRAW and open the bitmap image you want to crop.
- Select the Bitmap:
- Use the Pick tool to select the bitmap image you wish to crop.
- Navigate to ‘Bitmaps’ Menu:
- Locate and click on the “Bitmaps” menu in the top toolbar.
- Choose ‘Crop Bitmap’:
- Within the “Bitmaps” menu, select “Crop Bitmap.” This activates the cropping tool.
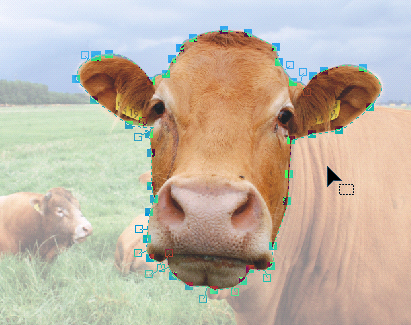
- Adjust Crop Handles:
- Resize and reposition the crop handles around the bitmap to define the desired cropping area.
- Ensure that the area you wish to keep is within the selected crop region.
- Finalize the Crop:
- Press “Enter” or click outside the cropped area to finalize the crop. The excess portions of the image are removed.
- Adjust Crop After Finalization:
- After cropping, use the Pick tool to click on the cropped image. Adjust handles or positioning as needed to fine-tune the crop.
Section 3: Advanced Techniques and Considerations
- Maintaining Aspect Ratio:
- Hold the “Shift” key while adjusting crop handles to maintain the original aspect ratio and prevent distortion.
- Non-Destructive Cropping:
- CorelDRAW’s cropping tool is non-destructive, preserving the original image. To access the full image later, click on the cropped image and adjust the handles.
- Cropping to a Shape:
- Use the “Crop to Shape” option to crop the bitmap to a specific geometric shape, such as a circle or rectangle.
- Applying Masks:
- Create complex crop shapes by applying masks. Draw a shape, select both the shape and the image, and use the “Mask” option to crop the image accordingly.
Section 4: Practical Applications and Use Cases
- Photo Editing and Retouching:
- Crop images to remove distractions, focus on the main subject, or adjust composition for aesthetically pleasing results.
- Web Graphics and Design:
- Crop images for web banners, social media posts, or website design to achieve optimal dimensions and visual appeal.
- Print Design and Publications:
- Precisely crop images for print materials, ensuring they fit the layout and meet specific design requirements.
- Product Photography:
- Crop product images to highlight details, remove background clutter, and create professional-looking visuals for catalogs or e-commerce platforms.
Section 5: Best Practices and Tips
- Save a Copy:
- Before cropping, save a copy of the original bitmap to preserve the unaltered image for future use.
- Use Grids and Guides:
- Enable grids and guides in CorelDRAW to assist in aligning crop regions and achieving precise compositions.
- Experiment with Crop Shapes:
- Explore various crop shapes and masking techniques to create unique and visually appealing compositions.
- Undo and Redo:
- Familiarize yourself with the “Undo” (Ctrl + Z) and “Redo” (Ctrl + Y) shortcuts to experiment with different crops without fear of irreversible changes.
Conclusion:
Cropping bitmaps in CorelDRAW is a fundamental skill that enhances the precision and visual impact of your designs. This comprehensive guide has provided a detailed walkthrough of the cropping process, from basic steps to advanced techniques and practical applications. Whether you’re refining images for web graphics, print materials, or creative projects, mastering bitmap cropping in CorelDRAW allows you to achieve professional-looking results with finesse and efficiency. As you integrate these skills into your design workflow, you’ll find that precise cropping is a key element in creating visually compelling and impactful graphics.