Mastering the Art of Pop Art: A Comprehensive Guide to Fast and Easy Techniques Using Lab Color in Photoshop
Introduction:
Pop Art, a revolutionary art movement that emerged in the mid-20th century, has continued to captivate and inspire artists and enthusiasts alike. Characterized by vibrant colors, bold patterns, and a sense of irony, Pop Art remains a powerful and influential style in the world of visual arts. In this comprehensive guide, we will explore an efficient and user-friendly approach to creating stunning Pop Art masterpieces using Lab Color in Adobe Photoshop.
Understanding the Essence of Pop Art:
Before delving into the technicalities of the Lab Color technique, it’s crucial to grasp the essence of Pop Art. Originating in the 1950s and reaching its peak in the 1960s, Pop Art challenged traditional artistic norms by incorporating elements from popular culture, mass media, and consumerism. Artists like Andy Warhol, Roy Lichtenstein, and Claes Oldenburg transformed everyday objects into vibrant, eye-catching works of art.
Lab Color: A Powerful Tool in Photoshop:
Lab Color mode in Adobe Photoshop separates an image into its luminance (lightness) and color components, providing a unique and powerful way to manipulate colors. Unlike other color modes such as RGB or CMYK, Lab Color allows for independent adjustment of color and brightness, making it an ideal choice for creating impactful Pop Art effects.
Step 1: Setting Up Your Workspace:
Open Adobe Photoshop and load the image you want to transform into Pop Art. Ensure that the image is in RGB mode, as Lab Color mode cannot be applied to grayscale or indexed color images.
Step 2: Convert to Lab Color Mode:
Navigate to Image > Mode > Lab Color. This action will split the image into its luminance (L) and color (a and b) channels.
Step 3: Enhancing Colors with Curves:
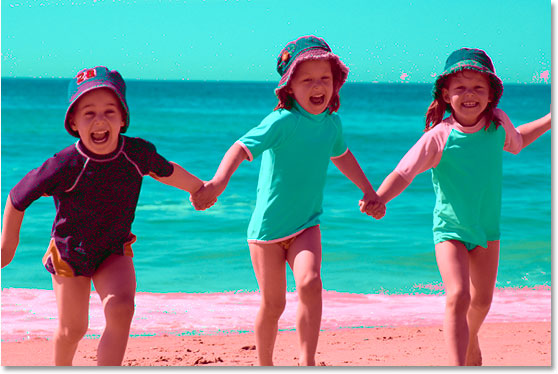
Select the “a” channel and go to Image > Adjustments > Curves. Experiment with the curves to enhance the intensity of colors. Focus on increasing the contrast between different color areas to achieve a vibrant Pop Art effect.
Step 4: Fine-tuning with the “b” Channel:
Switch to the “b” channel and repeat the process with Curves. Adjust the curves to enhance the blue and yellow tones, ensuring that the colors pop without losing the overall balance.
Step 5: Refining Luminance for Impact:
Return to the “L” channel and fine-tune the luminance. Use Curves to adjust the brightness and contrast, emphasizing key areas to create a dynamic visual impact.
Step 6: Combining Channels:
Switch back to RGB mode (Image > Mode > RGB). Your image is now transformed into a vibrant, Pop Art-inspired masterpiece.
Experimentation and Beyond:
The Lab Color technique provides a solid foundation for creating fast and easy Pop Art, but the true essence of this style lies in experimentation. Don’t hesitate to explore additional Photoshop tools, filters, and effects to further enhance your artwork.
Conclusion:
Mastering the art of Pop Art in Photoshop through Lab Color opens up a world of creative possibilities. By understanding the fundamentals of Pop Art and harnessing the unique capabilities of Lab Color, artists can effortlessly transform ordinary images into visually striking, contemporary pieces that pay homage to this iconic movement. So, dive into the world of color, contrast, and creativity, and let your imagination run wild as you embark on your journey to becoming a Pop Art virtuoso in Photoshop.