Mastering the Art of Data Integration: Importing X, Y, Z Coordinates from Excel to AutoCAD
In the dynamic world of design and drafting, the seamless integration of data is paramount. One common scenario that often arises in the realm of Computer-Aided Design (CAD) is the need to import X, Y, Z coordinates from Microsoft Excel into AutoCAD. This process, while seemingly straightforward, requires a systematic approach to ensure accuracy and efficiency. In this comprehensive guide, we will delve into the intricacies of importing coordinates, explore various methods, and equip you with the knowledge to navigate this data integration seamlessly.
Understanding the Basics: X, Y, Z Coordinates in AutoCAD
Before embarking on the journey of importing coordinates, it is crucial to understand the significance of X, Y, Z coordinates in AutoCAD. These coordinates serve as the foundation for defining points in three-dimensional space within the CAD environment. The X-coordinate represents the horizontal position, the Y-coordinate signifies the vertical position, and the Z-coordinate denotes the depth or elevation.
In AutoCAD, precise placement of objects often relies on accurate coordinate data. Whether you are working on architectural plans, civil engineering projects, or intricate mechanical designs, the ability to import coordinates from external sources can significantly enhance productivity and reduce the margin for error.
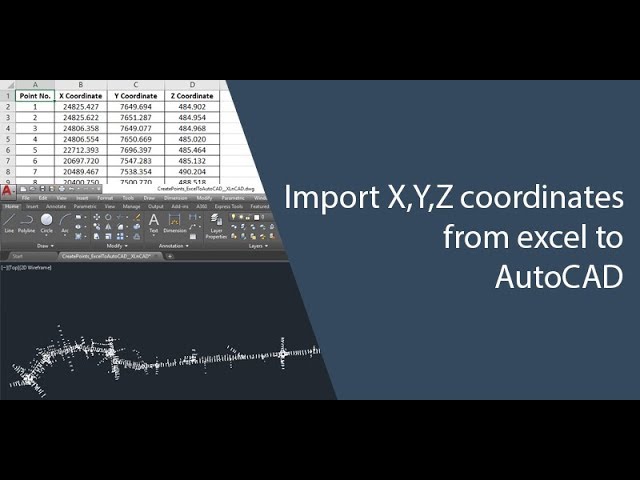
Preparing Excel Data for Import
The initial step in the process involves preparing the Excel spreadsheet for seamless integration with AutoCAD. The spreadsheet should ideally have three columns: one for X coordinates, one for Y coordinates, and one for Z coordinates. Ensure that the data is organized in a structured manner, and each row corresponds to a specific point in the design.
It is essential to validate the consistency and accuracy of the data. Check for any anomalies, missing values, or formatting issues that might disrupt the import process. The success of the data transfer is contingent on the quality of the input data.
Method 1: AutoCAD Data Extraction Tool
AutoCAD offers a built-in tool known as the “Data Extraction Wizard,” which facilitates the extraction of data from various sources, including Excel. Follow these steps to utilize this tool:
- Access the Data Extraction Wizard: In AutoCAD, type “DATAEXTRACTION” in the command line, and press Enter.
- Select Objects: Choose the objects in your drawing for which you want to extract the coordinates.
- Choose Output: Opt for the “Specify data extraction” option, and select the X, Y, Z coordinates from the available options.
- Specify Data Link: Create a new data link and choose the Excel format. Link the Excel file containing the coordinates.
- Configure Data Link Settings: Define how the data will be linked and whether it will be updated automatically.
- Review and Import: Review the summary and proceed to import the data into the AutoCAD drawing.
Method 2: AutoLISP Scripts for Custom Import
For users seeking a more customized approach, AutoLISP scripts provide a powerful solution. AutoLISP is a programming language within AutoCAD that allows users to create custom commands and automate repetitive tasks. Here’s a basic outline of the steps to create a simple AutoLISP script for importing coordinates:
- Open Visual LISP Editor: Type “VLIDE” in the AutoCAD command line to open the Visual LISP Integrated Development Environment.
- Create a New Project: Start a new project and create a new LISP file.
- Write the AutoLISP Code: Write the code to read the Excel file and import the coordinates. Utilize functions such as “setq” to set variables and “entmake” to create AutoCAD entities.
- Load the AutoLISP Routine: Load the created AutoLISP routine using the “APPLOAD” command in AutoCAD.
- Run the Custom Command: Once loaded, run the custom command (function) to execute the import process.
Method 3: Importing as a CSV File
An alternative method involves saving the Excel spreadsheet as a Comma-Separated Values (CSV) file, which can be easily imported into AutoCAD. Follow these steps:
- Save as CSV: In Excel, choose “Save As” and select the CSV format. Ensure that each column corresponds to X, Y, and Z coordinates.
- Import into AutoCAD: In AutoCAD, use the “Data Link Manager” to link the CSV file. This establishes a connection between the Excel data and the AutoCAD drawing.
- Insert Data: Once linked, insert the data into the drawing using the “Insert Data Link” command.
Common Challenges and Solutions
While importing coordinates into AutoCAD is generally straightforward, certain challenges may arise:
- Data Format Issues: Ensure that the Excel data format is compatible with AutoCAD. Use consistent units for measurements.
- Coordinate System Alignment: Confirm that the coordinate systems in Excel and AutoCAD align correctly to prevent discrepancies.
- Data Validation: Validate the accuracy of the imported data by cross-referencing it with the original Excel spreadsheet.
Conclusion: Enhancing Efficiency in CAD Workflows
Mastering the art of importing X, Y, Z coordinates from Excel to AutoCAD is a valuable skill for professionals in various design disciplines. Whether you opt for the built-in Data Extraction Wizard, leverage the power of AutoLISP scripting, or choose the simplicity of CSV file imports, the goal remains consistent: streamline workflows, enhance accuracy, and unlock the full potential of data integration in CAD environments.
As you embark on this journey of data integration, remember that each method has its merits, and the choice depends on the specific requirements of your project. With a solid understanding of the tools at your disposal and a strategic approach to data preparation, you can elevate your CAD experience and navigate the intricate world of three-dimensional design with confidence and efficiency.