How to create a new partition
Understanding Partitions
A partition is a logically defined section of a hard drive that appears as a separate volume to the operating system and users. Each partition can have its own file system and can be formatted independently from other partitions on the same disk. Creating a new partition allows you to allocate a portion of the disk space for specific purposes, such as installing a different operating system or organizing data into separate areas.
Before You Begin
- Backup Important Data:
- Before creating a new partition, back up any critical files and data on the disk to avoid data loss during the partitioning process.
- Check Disk Health:
- Ensure the hard drive is in good condition and free of errors. Use Windows Disk Management or a third-party disk utility to check for bad sectors or disk errors.
- Disk Space Requirements:
- Determine the size of the new partition you want to create and ensure there is sufficient free space available on the disk.
Using Windows Disk Management
Windows Disk Management is a built-in utility that allows you to manage disk partitions, including creating new partitions, resizing existing partitions, and formatting volumes.
- Access Disk Management:
- Right-click on the Start menu (Windows icon) and select “Disk Management” from the context menu.
- Alternatively, press Win + X and choose “Disk Management” from the Power User menu.
- Select the Disk:
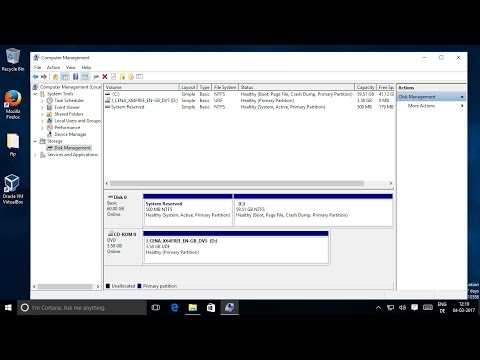
- In Disk Management, locate the disk where you want to create a new partition. Right-click on the unallocated space or free space on the disk and select “New Simple Volume…” from the context menu.
- New Simple Volume Wizard:
- The New Simple Volume Wizard will guide you through the process of creating a new partition. Click “Next” to proceed.
- Specify Partition Size:
- Enter the size of the new partition in megabytes (MB) or accept the maximum size by default. Click “Next” to continue.
- Assign Drive Letter or Path:
- Choose a drive letter from the drop-down menu to assign to the new partition. Alternatively, you can mount the partition in an empty NTFS folder on an existing volume. Click “Next” to proceed.
- Format Partition:
- Select the file system format for the new partition (typically NTFS for Windows) and provide a volume label for easy identification. Optionally, perform a quick format.
- Click “Next” to proceed.
- Completing the New Simple Volume Wizard:
- Review your selections for creating the new partition. Click “Finish” to start the partition creation process.
- Partition Creation Progress:
- Windows will create the new partition and format it according to your specifications. The time required depends on the size of the partition and the speed of your hard drive.
- Confirmation:
- Once the partition creation process is complete, Disk Management will display the new partition as a separate volume with the assigned drive letter or mount point.
Using Command Prompt
You can also create a new partition using Command Prompt, which provides more advanced options and flexibility:
- Open Command Prompt as Administrator:
- Press Win + X and select “Command Prompt (Admin)” or “Windows PowerShell (Admin)” from the Power User menu.
- Launch DiskPart:
- Type
diskpartand press Enter to open the DiskPart command-line utility.
- Type
- List Disks:
- Type
list diskand press Enter to display a list of all disks connected to your computer. Note the disk number of the disk where you want to create a new partition.
- Type
- Select Disk:
- Type
select disk X(replace X with the disk number) and press Enter to select the disk where you want to create the partition.
- Type
- Create Partition:
- Type
create partition primary size=Y(replace Y with the size of the partition in MB) and press Enter to create a primary partition of the specified size.
- Type
- Format Partition:
- Type
format fs=ntfs quickand press Enter to format the new partition using the NTFS file system. Replacentfswithexfatorfat32for different file system formats if needed.
- Type
- Assign Drive Letter:
- Type
assign letter=Z(replace Z with your preferred drive letter) and press Enter to assign a drive letter to the newly created partition.
- Type
- Exit DiskPart:
- Type
exitand press Enter to exit the DiskPart utility.
- Type
After Creating the Partition
- Restore Backed-Up Data:
- If necessary, copy your backed-up files back to the newly created partition.
- Use the New Partition:
- The new partition will appear as a separate drive in File Explorer. You can now use it to store files, install applications, or organize data as needed.
- Regular Maintenance:
- Periodically check and maintain your partitions using Disk Management or third-party disk utilities to ensure optimal performance and reliability.
Considerations and Tips
- Data Security: Always back up important data before creating or modifying partitions to prevent accidental data loss.
- Partition Size: Plan ahead and allocate sufficient space for each partition based on your storage needs and future requirements.
- Advanced Options: DiskPart offers more advanced partitioning options, such as creating extended partitions or adjusting partition sizes, which may require additional steps and caution.
Conclusion
Creating a new partition in Windows 10 allows you to organize and manage your hard drive more efficiently, whether for data organization, installing multiple operating systems, or other purposes. By following the steps outlined in this guide using Windows Disk Management or Command Prompt, you can safely create new partitions, optimize disk usage, and enhance your overall computing experience.


