Unleashing Creativity: A Comprehensive Guide on Filling a Shape with a Photo in Photoshop
Introduction:
Adobe Photoshop, the undisputed titan in the realm of digital imaging, offers an extensive array of tools for creative expression. One such captivating technique is filling a shape with a photo, a process that allows artists, designers, and photographers to infuse intricate details into distinct forms. This comprehensive guide aims to unravel the intricacies of this technique, offering step-by-step instructions, creative insights, and advanced tips to master the art of filling shapes with photos in Photoshop.
Section 1: Understanding the Basics
1.1 The Creative Potential:
- Filling a shape with a photo transforms the mundane into the extraordinary, enabling artists to merge visual elements seamlessly. This technique is widely employed in graphic design, digital art, and even photography, offering a unique approach to storytelling.
1.2 Essential Tools:
- Before delving into the process, familiarize yourself with fundamental tools in Photoshop such as the Pen Tool for creating shapes, the Move Tool for image manipulation, and the Layers Panel for organizing your composition.
Section 2: Creating a Shape
2.1 Utilizing the Pen Tool:
- Start by using the Pen Tool to create the shape you want to fill with a photo. Experiment with shapes like rectangles, circles, or custom forms depending on your creative vision.
2.2 Shape Customization:
- Explore options to customize your shape, adjusting parameters like color, stroke, and opacity. These settings will influence the visual impact of your final composition.
Section 3: Preparing the Photo
3.1 Selecting the Photo:
- Choose a photo that complements the shape you’ve created. Consider the theme, colors, and overall aesthetic to ensure harmony in your composition.
3.2 Image Resolution:
- Ensure that the resolution of the selected photo is adequate for your project. Higher resolutions offer sharper details, particularly important for intricate designs.
Section 4: Placing the Photo into Photoshop
4.1 Importing the Photo:
- Open the selected photo in Photoshop using the File > Open command. Alternatively, use the drag-and-drop method to import the photo into your Photoshop workspace.
4.2 Arranging Layers:
- Use the Layers Panel to arrange the photo layer beneath the shape layer. This layering structure is crucial for achieving the desired effect.
Section 5: Clipping Mask Technique
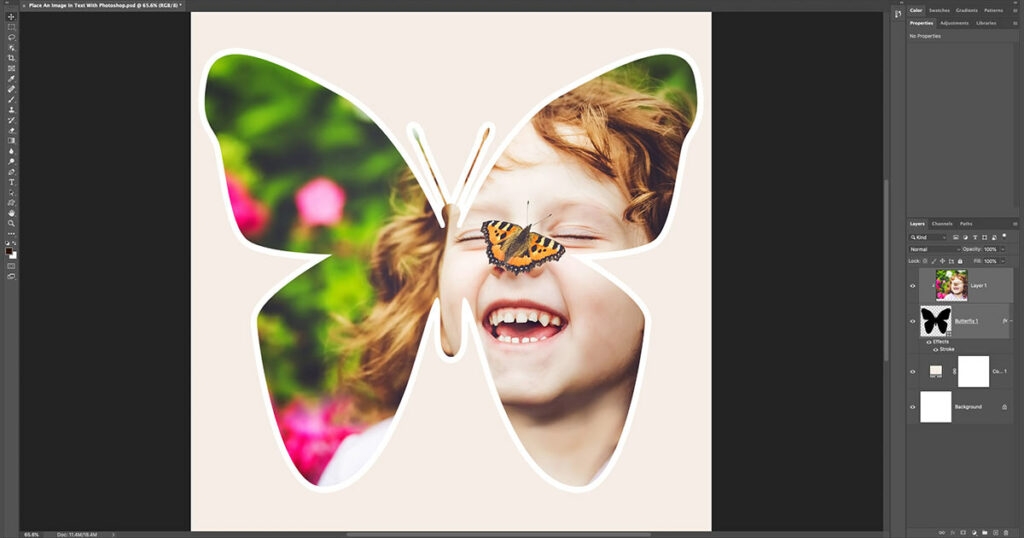
5.1 Creating a Clipping Mask:
- Employ the Clipping Mask technique to seamlessly blend the photo into the shape. Right-click on the photo layer, select “Create Clipping Mask,” and witness the magic unfold as the photo conforms to the shape.
5.2 Refining Edges:
- Fine-tune the edges of the photo within the shape using tools like the Eraser Tool or Layer Masks. This step ensures a polished and professional appearance.
Section 6: Advanced Techniques
6.1 Layer Blend Modes:
- Experiment with layer blend modes to add depth and nuance to your composition. Modes like Multiply, Overlay, or Soft Light can produce captivating visual effects.
6.2 Adjustment Layers:
- Integrate Adjustment Layers to refine the color, contrast, or saturation of the filled photo. This allows for dynamic adjustments without altering the original image.
Section 7: Adding Texture and Details
7.1 Texture Overlay:
- Elevate your design by overlaying textures onto the filled shape. Experiment with textures that enhance the thematic elements of your composition.
7.2 Incorporating Details:
- Pay attention to details within the shape. Use brushes, filters, or additional photos to add intricate elements, enhancing the overall visual impact.
Section 8: Saving and Exporting
8.1 Save Your Work:
- Save your project as a Photoshop (.PSD) file to retain layers and editable elements. Regularly save your progress to avoid potential loss.
8.2 Exporting for Various Platforms:
- When ready to share your creation, export the file in the desired format. Consider formats like JPEG or PNG, depending on the intended use (web, print, or social media).
Section 9: Troubleshooting and Tips
9.1 Common Issues:
- Address common challenges that may arise, such as pixelation, color discrepancies, or layer misalignments. Troubleshooting ensures a smooth creative process.
9.2 Creative Tips:
- Explore additional creative tips, such as using gradients, blending multiple photos, or incorporating text within the filled shape. These techniques add versatility to your design repertoire.
Section 10: Inspirational Examples
10.1 Showcasing Creative Applications:
- Explore inspirational examples where artists have masterfully filled shapes with photos, pushing the boundaries of creativity and showcasing the diverse applications of this technique.
Conclusion:
Filling a shape with a photo in Photoshop transcends the realm of mere digital manipulation; it’s a journey into the realms of artistry and visual storytelling. This comprehensive guide equips you with the knowledge and skills to seamlessly merge shapes and images, transforming your creative vision into captivating compositions. Whether you’re a seasoned designer or an aspiring artist, the ability to fill shapes with photos opens a gateway to endless possibilities in the boundless realm of digital creativity. Embrace the tools, experiment with techniques, and let your imagination flourish as you embark on this exciting journey of visual exploration in Adobe Photoshop.