Mastering Visuals: A Comprehensive Guide on Using PowerPoint to Edit Images
Introduction:
Microsoft PowerPoint, renowned for its prowess in creating dynamic presentations, is often overlooked as a powerful image editing tool. This comprehensive guide aims to unveil the diverse capabilities of PowerPoint in the realm of image editing. Whether you’re a professional presenter, a student working on a project, or someone looking to enhance images without dedicated graphic design software, this guide will walk you through the complete process of using PowerPoint to edit images.
Chapter 1: Unveiling PowerPoint’s Image Editing Features
Before delving into the specifics, it’s crucial to understand PowerPoint’s built-in image editing features. This chapter will explore the capabilities PowerPoint offers for image manipulation, covering features such as cropping, resizing, rotating, adjusting brightness and contrast, and applying artistic effects. Recognizing these features sets the stage for a comprehensive exploration of image editing in PowerPoint.
Chapter 2: Step 1 – Importing Images into PowerPoint
The first step in using PowerPoint to edit images is importing them into your presentation. This chapter will guide you through multiple methods, including drag-and-drop, the ‘Insert’ tab, and copying and pasting images. Understanding these import options ensures a smooth transition into the image editing process.
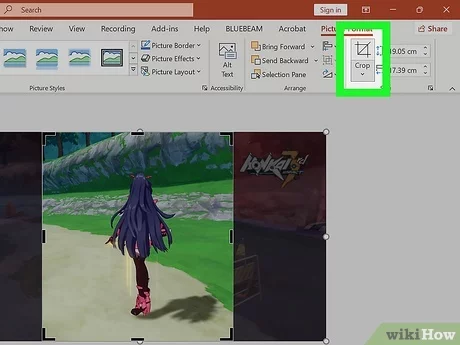
Chapter 3: Step 2 – Cropping Images for Precision
Cropping is a fundamental image editing technique, and PowerPoint offers robust tools for this task. This chapter will explore PowerPoint’s cropping features, covering aspects such as adjusting aspect ratios, cropping to specific shapes, and using the precise cropping tool. Mastering cropping techniques allows you to focus on the most impactful elements of your images.
Chapter 4: Step 3 – Resizing Images with Precision
Resizing images is essential for fitting them seamlessly into your presentations. This chapter will guide you through PowerPoint’s resizing options, covering methods like dragging corners, using the ‘Size’ dialog box, and maintaining aspect ratios. Understanding resizing techniques ensures your images harmonize with your presentation layout.
Chapter 5: Step 4 – Rotating and Flipping Images
To add dynamic visual elements to your presentation, rotating and flipping images can be effective. This chapter will explore PowerPoint’s rotation and flipping tools, providing insights into creating impactful visual effects. Mastering rotation and flipping allows you to enhance the visual appeal of your images.
Chapter 6: Step 5 – Adjusting Brightness and Contrast
Fine-tuning the brightness and contrast of images can significantly impact their visual impact. This chapter will delve into PowerPoint’s image correction tools, covering adjustments for brightness, contrast, sharpness, and saturation. Understanding these adjustments empowers you to create visually striking images within PowerPoint.
Chapter 7: Step 6 – Applying Artistic Effects
PowerPoint offers a range of artistic effects to add flair to your images. This chapter will explore these effects, including blur, shadow, glow, and artistic filters. Experimenting with artistic effects allows you to infuse creativity into your images, making them more engaging and visually appealing.
Chapter 8: Step 7 – Using PowerPoint for Background Removal
PowerPoint’s background removal feature is a powerful tool for isolating subjects in images. This chapter will guide you through the background removal process, covering manual adjustments, refinements, and tips for achieving clean results. Mastering background removal opens up possibilities for creating impactful visuals in your presentations.
Chapter 9: Step 8 – Adding Shapes and Text to Images
To create informative and engaging visuals, adding shapes and text to images is key. This chapter will explore PowerPoint’s tools for overlaying shapes and text, providing insights into positioning, formatting, and styling. Incorporating shapes and text allows you to customize images for various presentation purposes.
Chapter 10: Step 9 – Grouping and Ungrouping Images and Objects
Grouping and ungrouping images and objects in PowerPoint enhances your control over visual elements. This chapter will guide you through the process of grouping and ungrouping, covering scenarios where these functions are beneficial. Mastering grouping and ungrouping allows you to manage complex compositions with ease.
Chapter 11: Step 10 – Exporting Images from PowerPoint
After completing your image edits, the final step is exporting them for various purposes. This chapter will explore PowerPoint’s export options, including saving as an image file, copying to other applications, and exporting in different formats. Understanding export options ensures your edited images are ready for use beyond PowerPoint.
Chapter 12: Tips and Tricks for Efficient Image Editing in PowerPoint
To enhance your image editing workflow, this chapter will provide tips and tricks for efficiency. Topics covered include keyboard shortcuts, alignment guides, the ‘Format Painter’ tool, and using PowerPoint’s grid and ruler features. Incorporating these tips streamlines the image editing process and boosts productivity.
Chapter 13: Advanced Techniques for Image Editing in PowerPoint
For users seeking to delve deeper into image editing within PowerPoint, this chapter explores advanced techniques. Topics covered include image masking, color adjustments, and combining multiple images. Understanding these advanced techniques expands your capabilities in image manipulation.
Chapter 14: Troubleshooting Common Issues in PowerPoint Image Editing
Despite PowerPoint’s user-friendly interface, users may encounter common issues during image editing. This chapter will address potential challenges such as resolution discrepancies, formatting issues, and image quality concerns. Troubleshooting tips and solutions will be provided to help users navigate and resolve common image editing issues effectively.
Chapter 15: Integrating Third-Party Tools for Enhanced Image Editing
For users seeking additional features and capabilities, integrating third-party tools into the image editing workflow is an option. This chapter will explore popular third-party image editing tools, their features, and how to seamlessly incorporate them into PowerPoint for enhanced image editing. Leveraging third-party tools provides a broader range of image editing possibilities.
Chapter 16: Future Trends in PowerPoint Image Editing
As technology evolves, the landscape of image editing within PowerPoint may see emerging trends. This chapter will explore potential future trends, including improved AI integration, enhanced collaboration features, and increased automation. Staying informed about future trends prepares users for upcoming advancements in PowerPoint image editing.
Chapter 17: Real-Life Image Editing Success Stories in PowerPoint
To provide practical insights, this chapter will showcase real-life success stories of individuals and businesses that have effectively edited images using PowerPoint. Examining these experiences offers valuable lessons, tips, and inspiration for users embarking on their own image editing endeavors.
Conclusion:
Unlocking the full potential of PowerPoint as an image editing tool opens up a world of creative possibilities. This comprehensive guide has equipped you with a step-by-step approach, tips, tricks, and advanced techniques to seamlessly edit images within PowerPoint. Whether you’re a presenter, student, or casual user, may this guide serve as a valuable companion in your journey to mastering image editing with Microsoft PowerPoint.