Mastering Seamless Integration: A Comprehensive Guide on Opening Images into Photoshop from Adobe Bridge
Introduction:
In the dynamic realm of digital creativity, efficient workflows are the cornerstone of success. Adobe Bridge, a robust asset management tool, serves as the gateway to the Adobe Creative Cloud suite, connecting various applications seamlessly. This comprehensive guide aims to unravel the intricacies of opening images into Photoshop from Adobe Bridge, offering detailed insights, step-by-step instructions, and optimization tips to enhance your digital editing workflow.
Section 1: Understanding Adobe Bridge and Photoshop Integration
1.1 Adobe Bridge Overview:
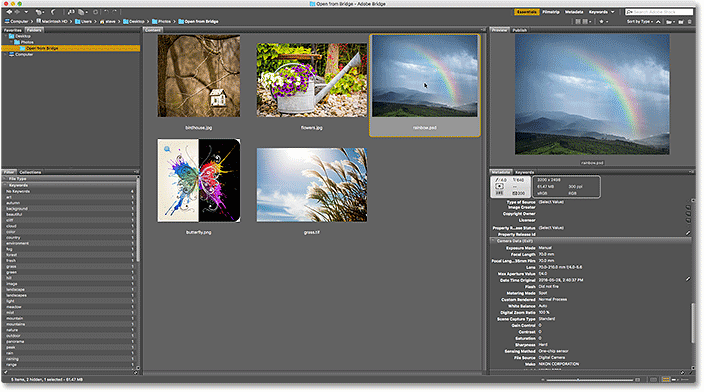
- Adobe Bridge acts as a central hub for managing and organizing digital assets, providing a comprehensive view of your files. It seamlessly integrates with other Adobe applications, facilitating a smooth transition between tasks.
1.2 Role of Adobe Photoshop:
- Adobe Photoshop, a powerhouse for image editing, complements Adobe Bridge by offering advanced editing tools and creative capabilities. The integration between Bridge and Photoshop streamlines the process of moving from asset management to intricate editing.
Section 2: Launching Adobe Bridge and Navigating Your Assets
2.1 Opening Adobe Bridge:
- Begin by launching Adobe Bridge. Familiarize yourself with the user interface, including the main workspace, panels, and navigation options.
2.2 Browsing and Selecting Images:
- Navigate through your digital assets using Adobe Bridge. Select and preview the images you want to edit in Photoshop, ensuring a clear understanding of your selection.
Section 3: Opening Images into Photoshop
3.1 Selecting Images in Adobe Bridge:
- Utilize Adobe Bridge’s selection tools to choose the images you wish to edit in Photoshop. This can include single images or a batch of selected files.
3.2 Initiating the Process:
- Right-click on the selected images, and from the context menu, choose “Open in Camera Raw” if raw files are involved, or “Open in Photoshop” for direct editing. This initiates the transition from Bridge to Photoshop.
Section 4: Seamless Integration with Adobe Camera Raw
4.1 Raw File Workflow:
- If your selected images are in raw format, Adobe Camera Raw (ACR) opens before Photoshop. Here, you can perform initial adjustments to exposure, color balance, and more, optimizing your images for advanced editing in Photoshop.
4.2 Editing in Adobe Camera Raw:
- Explore the editing capabilities within Adobe Camera Raw, including the Basic Adjustment panel, HSL controls, and localized adjustments. Leverage these tools to enhance your images before they transition to Photoshop.
Section 5: Advanced Editing in Photoshop
5.1 Transition to Photoshop:
- After making initial adjustments in Adobe Camera Raw, the selected images seamlessly transition to Adobe Photoshop for further, more intricate editing.
5.2 Photoshop Editing Tools:
- Familiarize yourself with the rich array of editing tools within Photoshop, including layers, masks, brushes, filters, and adjustment layers. Each tool contributes to the depth and complexity of your creative process.
Section 6: Saving and Exporting Edited Images
6.1 Saving in Photoshop:
- Once you’ve completed your edits in Photoshop, save your work. Understand the various saving options, including saving as PSD for future edits and exporting to common formats like JPEG or PNG for sharing or printing.
6.2 Back to Adobe Bridge:
- Your edited images can be automatically updated in Adobe Bridge. This seamless integration ensures that your Bridge catalog reflects the latest changes made in Photoshop.
Section 7: Optimizing Your Workflow
7.1 Customizing Adobe Bridge Preferences:
- Explore the preferences in Adobe Bridge to customize your workflow. Adjust settings such as cache size, thumbnail quality, and metadata display to optimize your experience.
7.2 Keyboard Shortcuts and Efficiency:
- Familiarize yourself with keyboard shortcuts in both Adobe Bridge and Photoshop to expedite your workflow. Efficient use of shortcuts enhances productivity and reduces repetitive tasks.
Section 8: Troubleshooting and Tips for Smooth Integration
8.1 Common Issues:
- Address potential challenges that may arise during the integration process, such as slow performance, file format compatibility, or unexpected errors.
8.2 Tips for Smooth Transition:
- Implement tips to ensure a smooth transition between Adobe Bridge and Photoshop. This includes regular software updates, managing system resources, and utilizing efficient file organization practices.
Section 9: The Continuous Evolution of Adobe Creative Cloud
9.1 Staying Informed:
- Keep abreast of updates and new features introduced in Adobe Creative Cloud applications. Regular updates may bring enhancements to both Adobe Bridge and Photoshop, optimizing your workflow further.
9.2 Exploring Additional Adobe Applications:
- Adobe Creative Cloud extends beyond Photoshop and Bridge. Explore other applications like Adobe Illustrator or InDesign for a comprehensive creative toolkit that addresses diverse design needs.
Conclusion:
Mastering the art of opening images into Photoshop from Adobe Bridge is not just a technical process; it’s a strategic step toward unlocking the full potential of your creative endeavors. By seamlessly integrating these Adobe applications, you streamline your workflow, optimize efficiency, and gain precise control over your digital editing journey. Embrace the synergy between Adobe Bridge and Photoshop, and let your creative visions unfold seamlessly across the vast canvas of endless possibilities.