Crafting Seamless Transitions: A Comprehensive Guide to Creating Audio Fades in DaVinci Resolve

Introduction:
In the realm of video editing, the importance of audio cannot be overstated. It’s not just about what the audience sees; it’s also about what they hear. Smooth and seamless transitions between audio clips can significantly enhance the viewer’s experience, creating a polished and professional final product. One of the most fundamental techniques in audio editing is the creation of fades, which gradually increase or decrease the volume of an audio clip over time. In this comprehensive guide, we’ll delve into the intricacies of creating audio fades in DaVinci Resolve, providing you with the knowledge and techniques to master this essential skill and elevate the audio quality of your video projects.
Understanding Audio Fades:
Before we dive into the specifics of creating audio fades in DaVinci Resolve, let’s take a moment to understand what fades are and why they are important.
- Fade-In:
- A fade-in gradually increases the volume of an audio clip from silence to full volume, creating a smooth and gradual introduction to the audio. Fade-ins are commonly used at the beginning of a track or scene to ease the listener into the audio and avoid abrupt jumps in volume.
- Fade-Out:
- A fade-out gradually decreases the volume of an audio clip from full volume to silence, creating a natural and gradual conclusion to the audio. Fade-outs are often used at the end of a track or scene to smoothly transition out of the audio and avoid sudden cutoffs or endings.
- Crossfade:
- A crossfade is a combination of a fade-in and a fade-out, where the volume of one audio clip decreases while the volume of another audio clip increases simultaneously. Crossfades are used to create seamless transitions between two audio clips, smoothing out any abrupt changes in volume or content.
Now that we have a basic understanding of what fades are and how they are used, let’s explore how to create them in DaVinci Resolve.
Creating Audio Fades in DaVinci Resolve:
DaVinci Resolve offers several methods for creating audio fades, each with its own advantages and applications. Let’s explore some of the most common techniques:
- Using the Fade Handles:
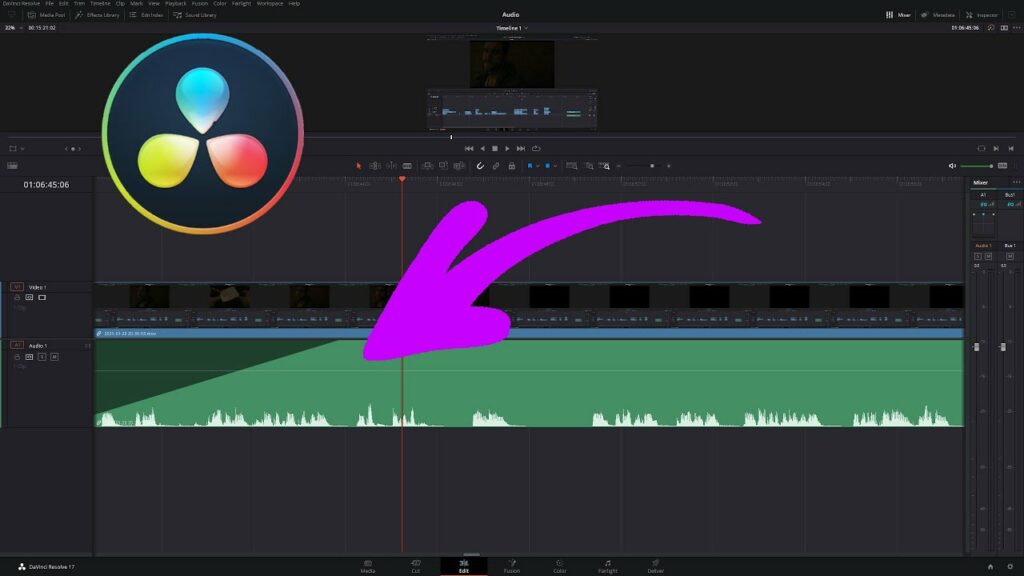
- One of the simplest ways to create audio fades in DaVinci Resolve is by using the fade handles directly on the audio clips in the timeline. To create a fade-in, hover your mouse over the beginning of the audio clip until the fade handle appears, then click and drag it to the right to increase the fade-in duration. Similarly, to create a fade-out, hover your mouse over the end of the audio clip until the fade handle appears, then click and drag it to the left to increase the fade-out duration.
- Using the Inspector Panel:
- Another method for creating audio fades in DaVinci Resolve is by using the inspector panel. Select the audio clip in the timeline, then navigate to the inspector panel on the right side of the interface. In the “Volume” section, you’ll find controls for adjusting the fade-in and fade-out duration. Enter the desired duration values in the “Fade In” and “Fade Out” fields to create smooth fades at the beginning and end of the audio clip.
- Using Keyframes:
- For more precise control over the shape and timing of your fades, you can use keyframes in DaVinci Resolve. Select the audio clip in the timeline, then navigate to the “Keyframe Editor” tab in the inspector panel. Add keyframes to the volume curve by clicking on the diamond-shaped icons, then adjust the position and shape of the curve to create custom fade shapes. You can also use the bezier handles to fine-tune the curvature of the curve and create smooth and natural fades.
- Using Audio Transitions:
- DaVinci Resolve also offers a variety of audio transitions that can be used to create fades between audio clips. To apply an audio transition, simply drag and drop it between two audio clips in the timeline. Adjust the duration and shape of the transition in the inspector panel to create smooth and seamless fades between the clips.
Best Practices for Creating Audio Fades:
To achieve optimal results when creating audio fades in DaVinci Resolve, consider the following best practices:
- Keep it Subtle:
- When creating audio fades, it’s important to keep them subtle and unobtrusive. Avoid creating fades that are too long or too abrupt, as this can draw attention away from the content of your video. Aim for fades that are smooth and gradual, blending seamlessly into the background without calling attention to themselves.
- Pay Attention to Timing:
- Pay close attention to the timing of your fades, especially when creating crossfades between two audio clips. Make sure that the fades occur at natural transition points in the audio, such as musical phrases or pauses in dialogue, to avoid creating jarring transitions that disrupt the flow of the video.
- Preview and Fine-Tune:
- After creating your fades, preview your audio track in the timeline to ensure that the fades sound natural and seamless. Listen for any abrupt changes in volume or content, and make adjustments as needed to achieve the desired effect. Use the playback controls to scrub through the timeline and audition the fades in real-time, making fine-tuning adjustments as necessary.
Conclusion:
Creating audio fades is a fundamental skill that every video editor should master. Whether you’re working with dialogue, music, sound effects, or ambience, well-executed fades can significantly enhance the overall quality and professionalism of your video projects. By understanding the different types of fades, mastering the various techniques for creating them in DaVinci Resolve, and following best practices for implementation, you can elevate the audio quality of your videos and create seamless and engaging viewing experiences for your audience. Experiment with different techniques, explore creative possibilities, and let your creativity shine as you master the art of creating audio fades in DaVinci Resolve.


